Showing posts with label Alphabet Adventures. Show all posts

Friday, August 29, 2008

Alphabet Adventures..."Z is for Zippered Pouches"

I'm only about a month late finishing up my Alphabet Adventures. Sorry about that! If you want to see the rest of this post series, click on "Alphabet Adventures" in the Labels section of the sidebar.

So...last one. Today is brought to you by the Letter Z and Zippered Pouches. These are handy little gadgets for all kinds of things. Make-up. Ipods. Tissues. For packaging a little gift. And they're simple to make. And to save you the effort of figuring it out on your own, here is a photo tutorial.

Zippered Pouches Tutorial


Step One - Cut two squares of fabric. I don't worry too much about size at this point. I like to trim to my exact desired size AFTER the zipper installation. Pick a zipper. It's fun to do a contrasting color or if you're the matchy-matchy type, go for that!


Step Two - Use a zipper foot if needed. My machine has an option where I can move the needle far enough to one side to eliminate the need for a zipper foot on sufficiently dainty zippers. So my photos won't show a zipper foot. Do what's needed for your own machine. Fold back one edge of of one of the fabric swatches. Unzip the zipper. Align the zipper to the folded edge leaving a little of the zipper tape to show for a touch of color! Align the raw edge of the top of the zipper tape to the raw upper edge of the fabric swatch. Topstitch zipper in place.


Step Three - Repeat with the other side of the zipper tape and the other swatch being sure to align the top of the zipper tape to the swatch's raw upper edge.


Step Four - Shut zipper. Stitch across the bottom of the zipper about a half inch from the bottom edge of the fabric swatch to create a new zipper top. Backstitch a couple of times to secure. Trim excess zipper.


Step Five - Trim front of pouch to desired size. Allow for 1/4 inch seam allowances.


Step Six - Cut a fabric swatch for the back using the front as a pattern.


Step Seven - Unzip the zipper slightly. Place front and back right sides together and stitch all the way around using a 1/4 inch seam allowance. Trim corners.


Step Eight - Turn pouch through zipper opening. Shut zipper. Press pouch. If using a nylon zipper be careful not to melt zipper with iron. Embellish as desired.


Thursday, July 31, 2008

Alphabet Adventures - "Y is for YOU!"

Today's Alphabet Adventure is brought by the Letter Y and YOU! That's right, YOU! It's your turn to sew. And maybe win a prize for your efforts. Here are a list of online sewing contests I've searched out for you, as well as some suggestions for finding contests locally. If you decide to enter any of these and win, be sure to let me know!



Make It With Wool - I have been fascinated with this contest ever since my Jr. High Home Economics buddy, Mari Moser, won 3rd place in the National Contest. She was a school celebrity for weeks. :) While the 2008 contest has already closed, keep an eye on the website for 2009! This is a great contest with really good-looking entries.

Pattern Review Contests - The Pattern Review website has quite a few ongoing contests on a variety of subjects from Lined Jacket to Stash-busting to Charity sewing. Prizes are usually donated sewing-related items from the websites various sponsors. I won an ironing board cover there as 2nd runner up in a charity sewing contest! :)


Love to Sew/Fashion Design Contest
This is a "fashion forward" contest for designers of all ages. Lots of age categories. Prizes supplied by Crafts of Chadds Ford.


Love to Sew Quilt Contest
- Also sponsored by the Love to Sew website. This has several quilt categories in various age and skill categories. Winning quilts to be displayed on the website.


American Sewing Guild Contest
- If you're a member of the American Sewing Guild, they have a yearly contest. The 2008 season is already closed, but it's not too early to start thinking about 2009. I've been thinking about joining the guild for some time. Are any of you readers members?

World of Waverly Decorating Contest - This is a national sweepstake with some pretty tempting prizes. A trip to New York. The services of a top decorator. You simply write an essay on how Waverly fabrics changed your family's life or some such thing. :) I'm sure you could spin this if you just thought long enough!


U-Handblog Amy Butler Bags Monthly Contest
- A monthly contest sponsored by teh U-Handblog site. If you haven't been there before you need to get over there and check out her cool bags. Some great tutorials as well. Her monthly contest features bags made from the Amy Butler bag patterns.

Indie Fixx, a crafting blog, has frequent giveaways and contests. Check out the current going-ons HERE.

While not currently running a contest, the Sew Mama Sew blog frequently offers contests and giveaways. Their most recent Tutorial contest was fantastic! Pop in to see what they offer next.

Its-sew-karren.com maintains a listing of currently running contests. Bookmark this one!

American Quilters Society - This national quilting organization features five different quilt expos around the nation in 2008. Each expo includes a quilt competition. Check out the website to see which are still open for 2008 and to download a registration guide.

Sew News is having a "Design a Falling Leaf Applique" contest. Winners will be featured in the December 2008 Sew News as well as online. The deadline is August 15th, so get a move on!

Here's your chance to win a Bernina Artista. Enter the "Festival of Machine Embroidered Quilts" contest. The deadline is coming soon, so visit HERE!

State and County Fairs - Fall is coming and with it state and county fairs from coast to coast. These local fairs are usually great opportunities to showcase your talent and earn (admittedly modest) cash prizes.

Local Quilt and Sewing Shops - Check the bulletin boards of your local sewing and quilt shops for national and local contest announcements. I have often seen local quilt guilds sponsor a variety of themed contests. If you're nervous about entering a national competition, get your feet wet these way!

Sewing Magazines - When you have nothing better to do in a grocery store, rifle through the sewing and craft magazines. Most magazines sponsor several contests a year on very specific subjects.

Okay...now it's up to YOU! Get out there and strut your stuff. Who knows? You may carry home a blue ribbon!

Charity

Tuesday, July 29, 2008

Alphabet Adventures - "X is for Xylitol"

Hah! Bet you thought I'd get stumped on this one. :) Today's Alphabet Adventures is brought to you by the Letter X and the word "Xylitol."

Xylitol is a naturally occurring substance that can be found in plants, fruits, and vegetables and is even produced in the human body by normal metabolism. Xylitol has no known toxicity or carcinogenicity. It is listed by the US Food and Drug Administration as an ingredient that is Generally Recognized As Safe (GRAS). It has a long history of use in food dating back to the 1960's and is included in such products as chewing gum, syrup, toothpastes, mouthwashes, and pharmaceuticals.

Why am I talking about Xylitol on a blog dedicated to the domestic creative arts? Well...because Xylitol is a natural sugar substitute and can be used in baking. It does not have the glycemic concerns that sugar does nor the toxicity issues of other sugar substitutes. It's also easier to bake with than sugar substitutes with a more realistic texture and taste. And as a bonus, it's a one-for-one equivalent so there's none of those mathematical gymnastics required in using a sugar substitute when baking.

I have been trying to move our family towards healthier eating, but have been uninspired by sugar substitutes to date. However, I have a friend who swears by Xylitol and uses it regularly. So....Xylitol is my Great Last Hope. Here are some recipes and websites I've found recently. I'll let you know how it goes as I begin my baking experimentations.


Sweeten Your Life the Xylitol Way (A cookbook I'm considering) - Website contains some sample recipes.

Sweet Savvy - One woman's experimentation with Xylitol. Contains numerous recipes

Xylitol Recipes with Photos

General Xylitol Information

Charity

Monday, July 28, 2008

Alphabet Adventures - "W is for Wag The Dog"

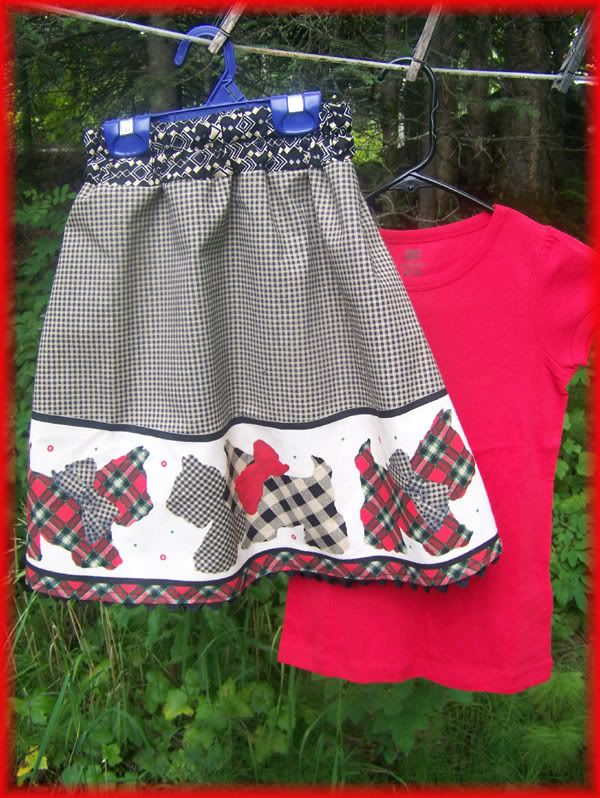
Today is brought to you by the Letter W with this little skirt I've titled "Wag the Dog". I am in the middle of making four skirts today. They need to be mailed asap to my father who is making a trip to Guatemala to work in The Shadow Of His Wing Orphanage, the same one where we will be sending The Hundred Skirts Project. While there he will also be visiting two families that he and my mother befriended. There are four daughters between these two families and the skirt sets are gifts for these girls, ages 6, 8, 13 and 13.

This skirt set is a Size 6. It was made from Daisy Kingdom fabric. I ran short and had to use a secondary fabric for the double-tunneled waistband. I will be covering some buttons from that prints to add to the center of the doggies' bows. Hopefully, that will keep it from looking too ad lib. The tee shirt will most likely cover it anyway!

Three more to go today! I've got to get scooting!

Saturday, July 26, 2008

Alphabet Adventures - "V is for Vintage"

If you've followed my blog at all, then you probably already guessed that today would be brought to you by the Letter V and "Vintage." However, I haven't decided what yet. There's so much vintage around here to choose from. Patterns? Fabric? Collectibles? Trims? Sigh...I'm still surveying and making up my mind. Undecided seems to be my chosen mode lately. I'll be back with something vintage. I promise.

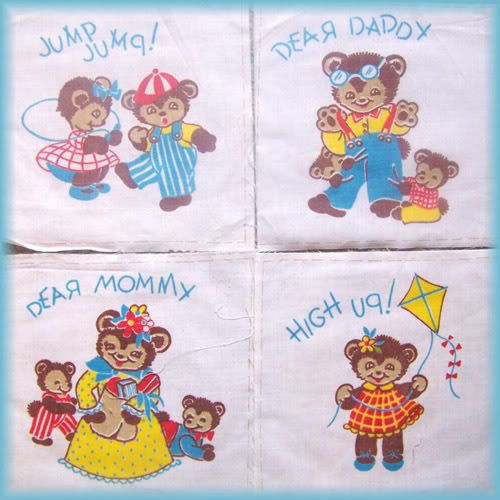
UPDATE: I decided to share some vintage children's printed quilt blocks that I found in my thrift store wanderings. I have seen these on Ebay on rare occasions, but never been able to get information about the maker or the date. I'm thinking they are 40s era.

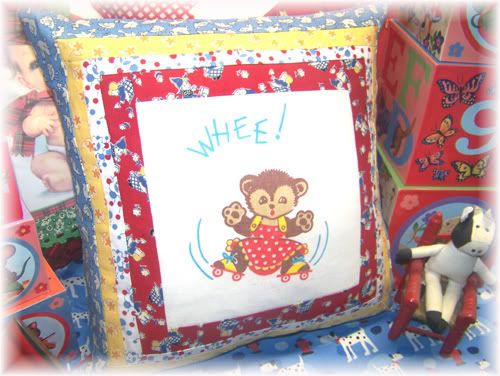
I found six of these little teddy bear blocks. Two became pillows that I sold on Ebay (see below). I have four left. I'm thinking they will probably become a baby blanket by adding in wide piano key sashing.


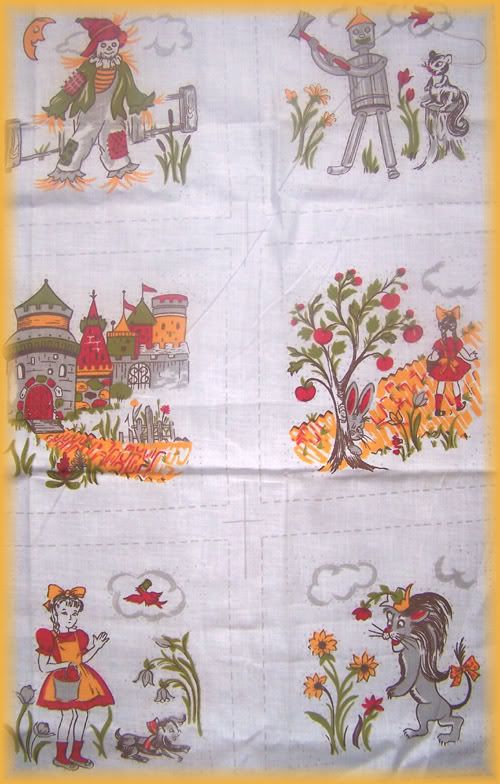
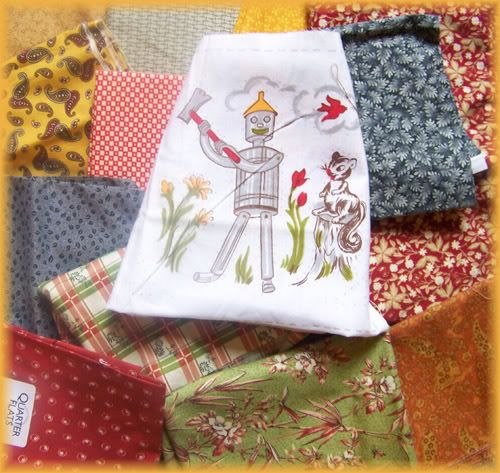
I have 12 of these Wizard the Oz blocks. Two of each of the design shown below. This will become a larger children's quilt using the fabrics shown in the bottom picture. I haven't yet decided on the block style. I'm thinking perhaps some Log Cabin framing around each of the blocks? The quilt will then most likely be sold on Etsy. I'll post a pic when its done. It will be awhile as I'm going to start on Christmas gifts soon. They will get priority. But I may reopen my Etsy shop in early 2009.


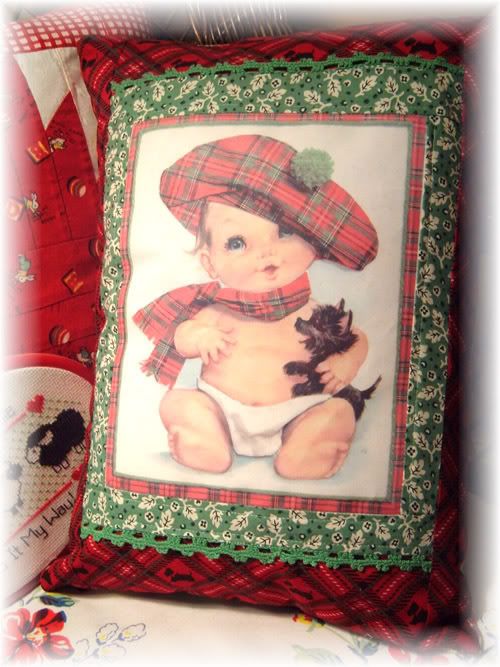
While searching for the pillow photo in Photobucket, I came across this previous creation and thought I'd share it with you as well. This was made by scanning a 1960s-era giant greeting card onto transfer paper and then ironing it on to muslin. It was then framed with a 1930s repro fabric and some scotty dog fabric.


Charity

Friday, July 25, 2008

Alphabet Adventures - "U is for Undecided"

The Letter U is going to involve a little audience participation, so find the comment box and get your trigger finger ready....

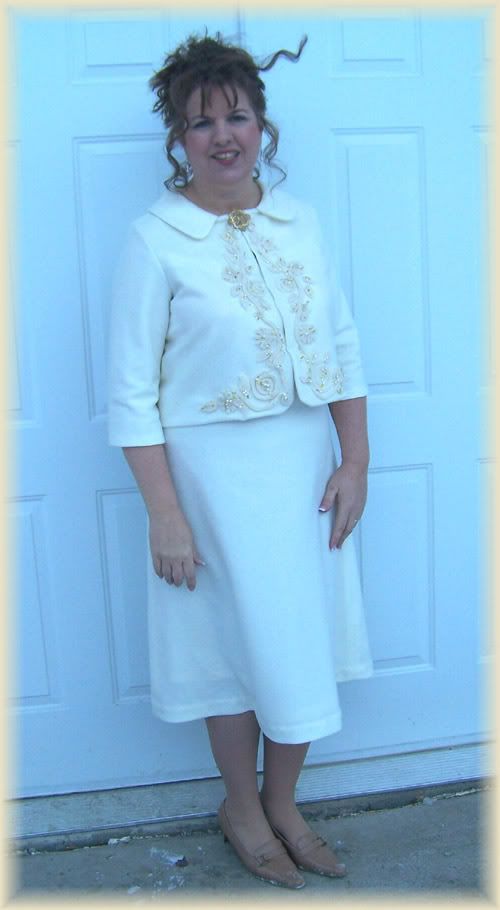
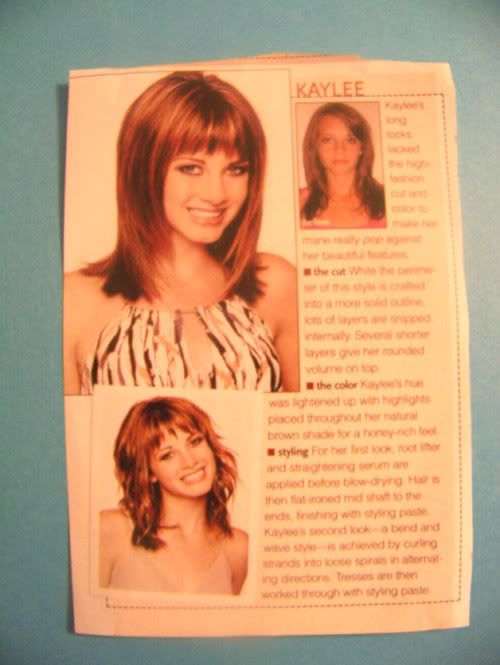
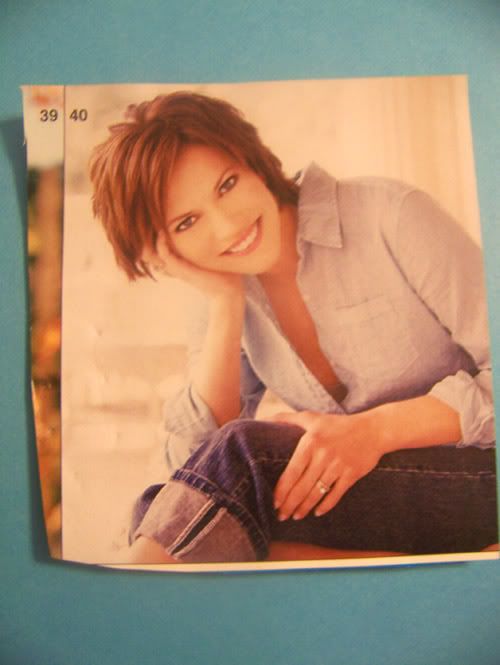
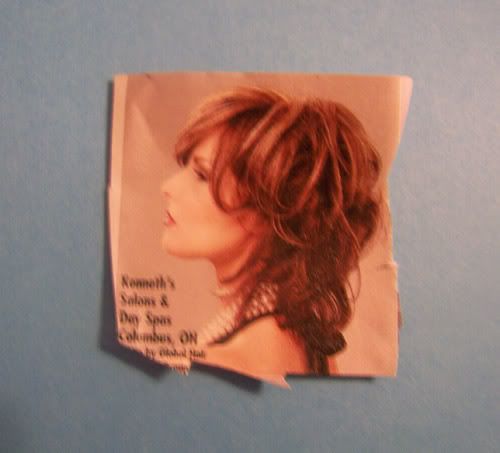
I am long overdue for a hairstyle change. I have always worn my hair long, full, layered with wave or curl. My husband likes it this way so I can't go to short. My face is rather full so too straight and flat on top doesn't look good on me either. I need a little volume on top and around the eyes. Okay...with those parameters in place, what do you think?

This is me now. My hair is up so you can't really see what it normally looks like. And I had curled it with those crimping irons. It's not normally kinky like that.


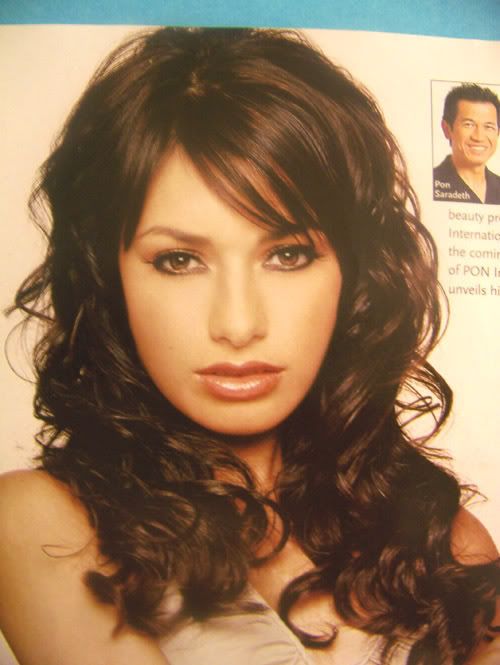
And here are the candidates. Please keep in mind that I look NOTHING like any of these gorgeous women and that no hair cut on earth is going to transform me to model material. I've accepted that and am prepared to deal.

Hair Style #1 - I love this, but think it's probably too close to what I have now and won't give me the change I'm looking for. DH, however, loves this look and he has to look at me more than I do...

BTW, that's not her before picture there in the corner. If I thought this haircut had this kind of transforming power, this post would be non-existent.


Hair Style #2 - I like the versatility on this one. The straight or curly. I also like the fun bangs. My concern is that it's too flat on top. And dh's input???..."It looks like she's wearing a helmet." Sigh.


Hairstyle #3 - Now I LOVE this one. If I had a lot of courage, this is what I'd go for. I know my hair type would work well with this one. And it's just so darn "free and easy" looking. However, I'm a little afraid of that much change. I haven't had my hair above my shoulders in about 20 years! And I know DH won't be crazy about it.


Hairstyle #4 - This one is probably the most reasonable choice. It's still a little long, but it still offers a big change from what I have now. My husband doesn't mind it. It has the volume that I need around the eyes and on top. So what's the problem? For some reason it screams "Joan Collins" to me. Maybe it's the pearls. Maybe it's the lipstick. But it scares me a little. Will I look like a 60 year old woman who has never outgrown her (debatable) glory days? It just looks a little "mature" for me. On the other hand...I AM 48yo and way past the Morgan Fairchild haircut days.

Help me, ladies. There's no better way to make such a personal and important decision than to relegate it to people who have never met you and whom you barely know....


Leave a comment, please. I need to make up my mind by next Wednesday.

Charity

Alphabet Adventures - "T is for Twisted Tucks"

Continuing on with some alphabetic creativity...today is brought to you by the Letter T with a tutorial on Twisted Tucks. This is a technique I learned from a wonderful book called Manipulating Fabric. About 8 years ago, I made a vest of an ethnic ikat fabric using this technique on the vest front. It closed with toggle loops and bone buttons. It really turned out neat. I hope to make another similar to it this fall.

Twisted Tucks Tutorial


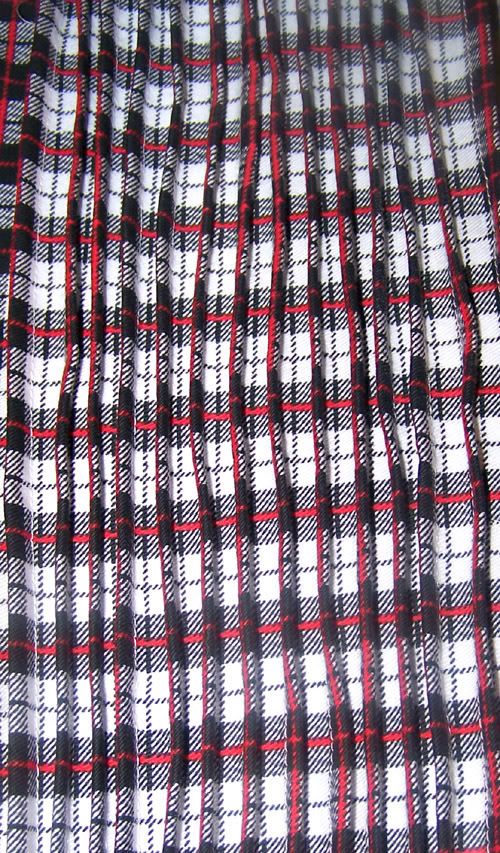
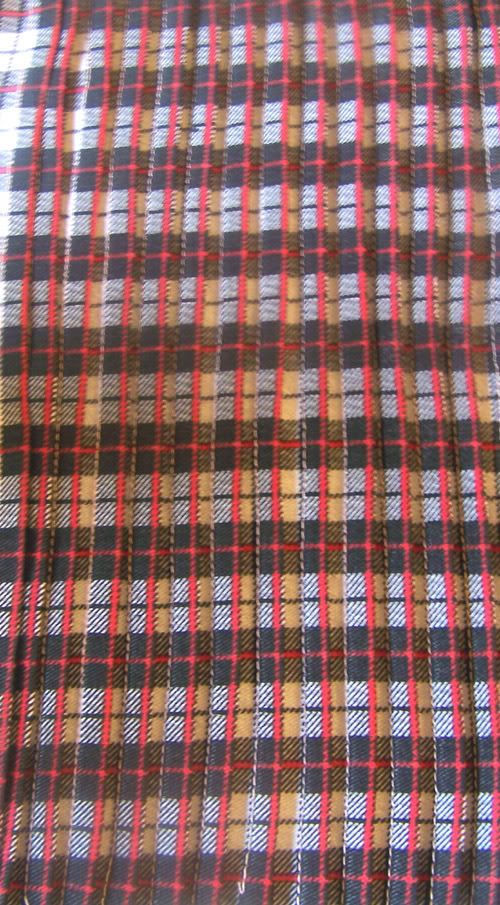
Step 1 - Create a series of narrow tucks evenly spaced across your width of fabric. The tucks take up a great deal of room so you will need a much larger piece of yardage than the pattern piece actually requires. Different sizes of tucks provide different results. As do the amount of spacing between them. You may want to experiment until you get the effect desired. For the purposes of this tutorial, I used 1/4 inch tucks spaced 3/8 inch apart. A good way to learn this technique is to use a plaid with a regular repeat as I did here. The plaid's horizontal and vertical lines make a wonderful stitching guide and eliminate the need for pre-marking. Twisted Tucks on plaid also give a neat secondary effect.

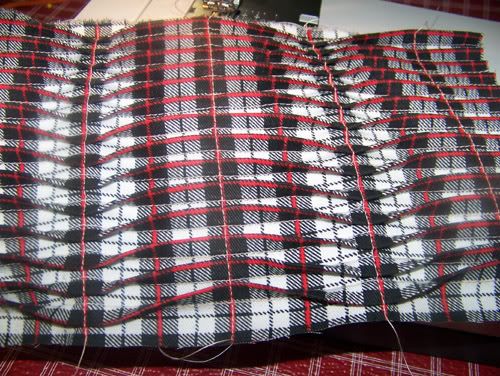
Step One - Sew narrow tucks the full width of your fabric


Step Two - Press the tucks in one direction.


Step Three - Sew across the tucks in vertical seams. Alternate the direction each row so that the tucks create their definitive "twist." If your tucks are closely spaced together, you will need to pull each tuck up from under the presser foot so that it does not inadvertantly get sewn down the wrong direction.

Step Three - Stitch across tucks vertically.


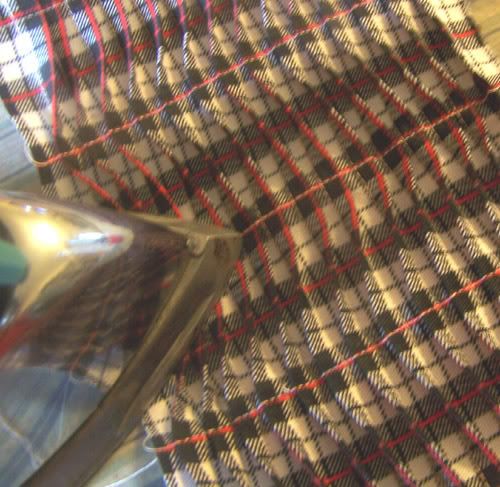
Step Four - With tip of iron or a mini-iron, press the tucks in the direction they've been sewn.


Step Five - Cut pattern piece from the yardage you've created. Assemble garment.

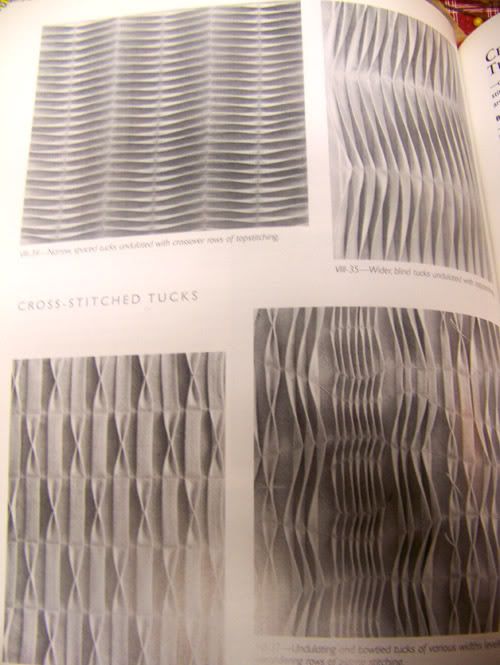
You can vary the width and spacing of the tucks as well as the directional seams to get a wide variety of looks. Here are some examples from Manipulating Fabric.


Charity

Wednesday, July 23, 2008

Alphabet Adventures - "S is for Sharks Teeth"

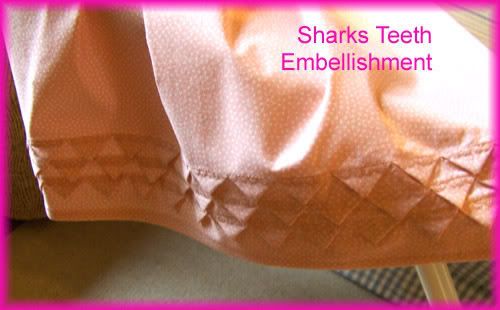
Today is brought to you by the Letter S and "Sharks Teeth." Confused as to where I'm heading with this? Sharks Teeth is a sewing technique that involves creating blind tucks in fabric, then snipping the tucks in intervals before folding in the raw edges created and sewing them in place. Hmmmmm....maybe it will just be easier to show you. Photos coming in the next couple of hours. I'm sewing now. :) :)


Sharks Teeth Tutorial


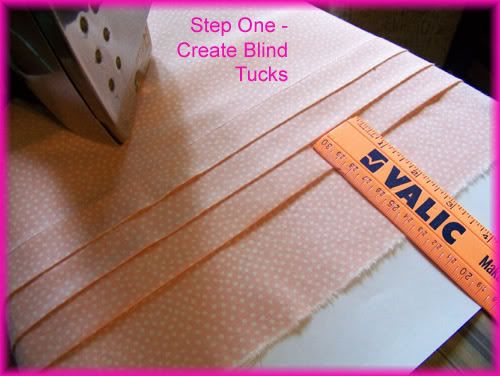
Step 1 - Create a series of blind tucks 3/4 inches wide. Each row should just meet the next row. How many tucks to do depends upon your design. For this skirt, I decided to do three rows.


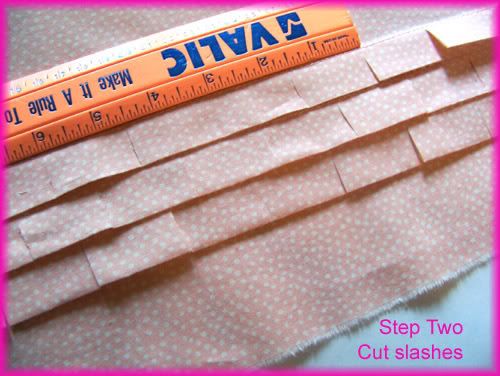
Step 2 - Slash the tucks at intervals 1.5 inches apart, cutting up to, but not past the seamline. Alternate the slashes so that the cuts on one row meet the middle of the "tooth" on the next. It should resemble the way bricks are laid.


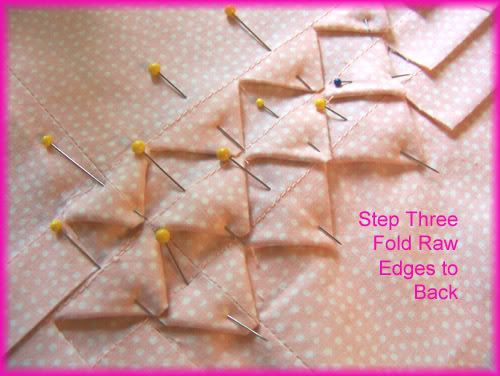
Step 3 - Turn the cut edges to the back of the "tooth" so that the raw edges meet in the middle, folding at a 45 degree angle. Press neatly. Repeat for all teeth.


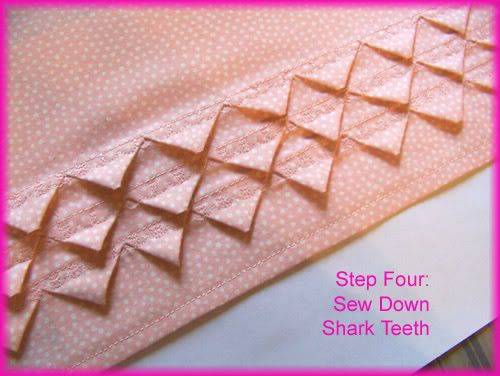
Step 4 - To catch and hold the folds in place, restitch the horizontal tuck seam in a wide zigzag being sure to catch the raw edges underneath the tooth. I used a decorative tulip stitch on this skirt. It is headed to Guatemala as part of The Hundred Skirt Project. I was concerned that the shark teeth be durable to hold up to the more aggressive laundering they will receive at the orphanage (the girls sometimes do their own laundry using concrete washboards!).


Step 5 - Press teeth and assemble garment.

You can see an example of a child's dress with a Sharks Teeth bodice here.

Tuesday, July 22, 2008

Alphabet Adventures - "R is for Recipes"

I had promised some pie recipes to Keely and Karen in one of the posts below. I'm overdue so today's the day! Brought to you by the Letter R...Recipes for Chocolate Peanut Butter Mousse Pie, Blackberry Streusel Pie and Key Lime Pie.

Blackberry Streusel Pie

Crust - Use your favorite recipe or a graham cracker crust

Topping
6 tablespoons (packed) brown sugar
6 tablespoons whole almonds
6 tablespoons (3/4 stick) butter, cut into 1/2-inch cubes
4 1/2 tablespoons old-fashioned oats
4 1/2 tablespoons flour

Blend in food processor until ingredients begin to clump into a mass.

Filling
1 cup sugar
1/4 cup quick-cooking tapioca
2 tablespoons fresh lemon juice
5 cups assorted fresh or frozen blackberries

Mix sugar, tapioca, and lemon juice in large bowl. Add berries and toss gently to combine. Let stand until tapioca softens slightly, stirring occasionally, about 45 minutes. Spoon filling into crust. Crumble topping evenly over filling. Bake pie until crust and topping are golden brown.

---------------------------------

Key Lime Pie - This is off the back of the Key Lime juice bottle. It's nothing special. I'm still looking for a better recipe.

Use a graham cracker crust.

Mix together:

4 large egg yolks
a 14 oz can of sweetened condensed milk
1/2 cup key lime juice

Pour into crust and bake at 350 for 15 minutes until lightly browned and fairly set in middle (will set up a bit on cooling). Cool completely Top with fresh whipped cream and garnish with lime slices or peel curls. Store in fridge.

-------------------------------------

Chocolate Peanut Butter Mousse Pie

This is my own recipe and I pretty much eyeball the ingredients and add as I think is needed. So these ingredients are estimated. Sorry about that. It's just the way I cook. :)

In a double boiler melt:

A bag of chocolate chips
About a half cup or so of peanut butter, more if you like peanut butter :)
8 oz. of cream cheese

Remove from heat. Make up a large box of instant chocolate pudding. Gently fold into the peanut butter mix. Gently fold in a tub or so of Cool Whip. Pour into a graham cracker crust and chill.

Charity

Alphabet Adventures - "Q is for Quilt "

Next up on my alphabetic creative ventures is the Letter Q and the word "Quilt." Today I decided to pull out my Japanese Lavender Quilt and do a bit more work on edge finishing the fused appliques. The design's branches are done by needle turn applique while the leaves and blossoms are done with fuse-and-buttonhole stitch. I have only about 18 more of the leaves to complete and the quilt top will be ready for basting, quilting and binding. This is the quilt that is headed to Nana's House, a safe house for young girls separated from their parents.

Here is a sample of what the buttonhole edge finishing looks like.


Charity

Alphabet Adventures - "P is for Pink Paisley Pajamas"

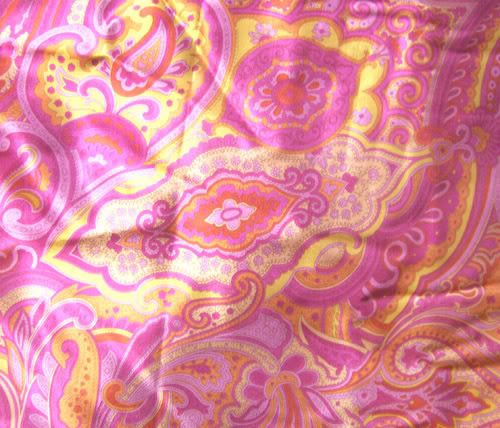
Playing catch up here...Today is brought to you by the Letter P and "Pink Paisley Pajamas". This is a beautiful piece of flannel backed satin that has been in my stash for at least three years. I've decided to make myself some pajamas and a short robe (if there's enough yardage). I'll use the pattern below. I hope to get these completed in time to take on an upcoming trip and will post pics when done.


Charity

Thursday, July 17, 2008

Alphabet Adventures - "O is for Orange"

Today is brought to you by the Letter O and the color Orange. I made this little skirt using the same pattern used in the post below. It too will be headed off to Guatemala as part of our Hundred Skirts Project. It's made from an orange striped denim that I have had in my stash for quite some time. There are flatfell seams for extra durability. It's trimmed with a hot pink polka dot grosgrain ribbon and purchased heart applique. I'll buy a hot pink tee to go with. :)

Skirt #47 "Orange You Glad?"


Skirt #47 "Orange You Glad?" Hem Detail


Charity

Wednesday, July 16, 2008

Alphabet Adventures - "N is for New Look 6450"

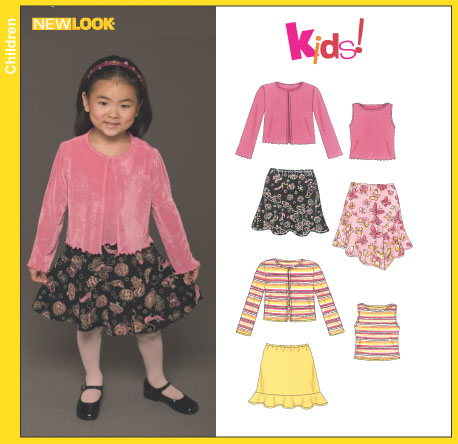
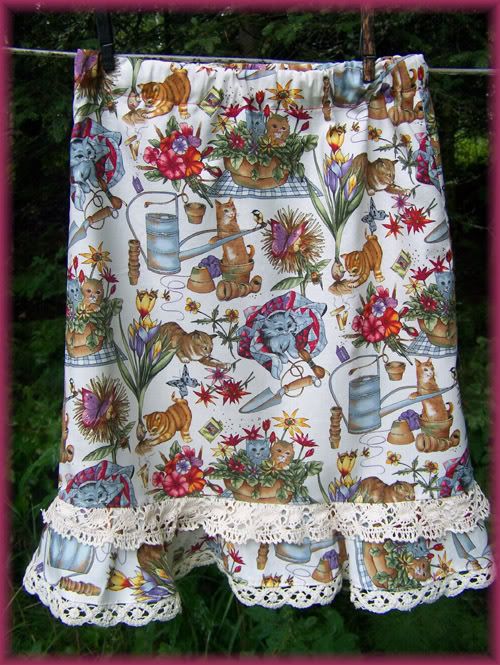
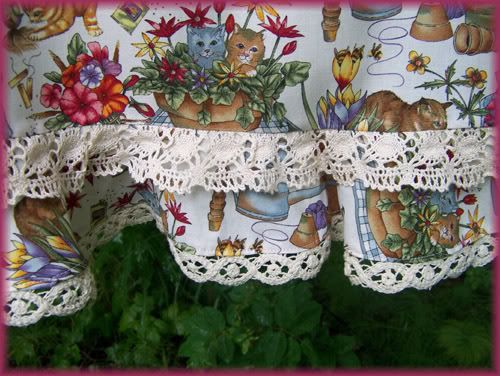
Today is brought to you by the Letter N and New Look Patterns #6450. This is a little skirt for The Hundred Skirts Project. It was squeezed out of a small bit of Kitty yardage in a high grade quilting cotton. I trimmed it with two different types of vintage Cluny lace and a hem flounce. It is a Size 8. I'm not sure what type of tee I'll buy for it yet. I'd love one in the magenta shade in the print, but that will probably be a hard match. More likely that I'll find a cream or tan to go with. Will see...

That brings our actual Received Skirt count up to 46 skirts. I also have four more here from Andrea that I will share with you as soon as it stops raining. Once I post Andrea's skirts (which are totally adorable!), we will be at 50 - the halfway point! If you still have not sent in your skirt, the deadline is December 1st. We had to move it back from the hoped for August hand delivery because it was cutting it too tight for too many of our participants. So...mark your calendars for December 1st!

New Look Pattern #6450


Skirt # 46, "Kitty in the Garden", Size 8


Detail of "Kitty in the Garden"

Tuesday, July 15, 2008

Alphabet Adventures - "M is for Mod"

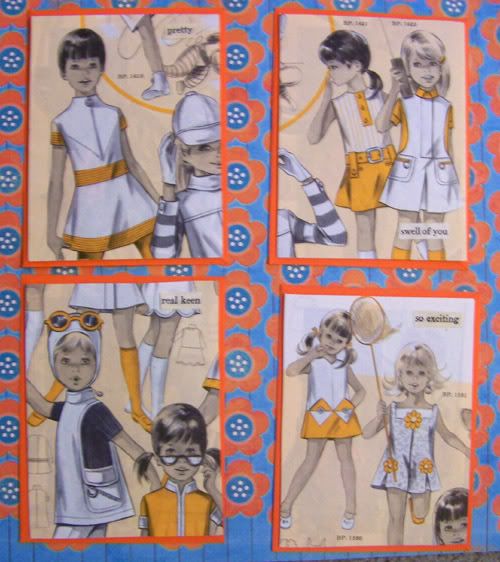
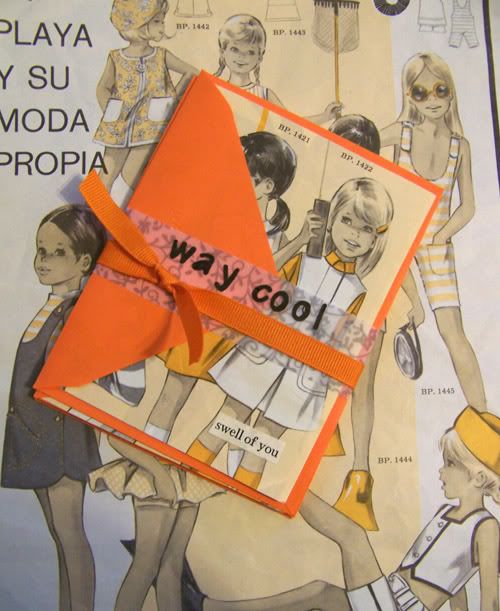
Today's Alphabet Adventure is brought to you by the "Letter M" and the adjective, "Mod." I love the graphics from the 60s and 70s. So retro. When I found this Patron magazine from the late 60s, I thought it would make the cutest notecards. So I whipped them out tonight while watching Season 2 of The Office with DH. It's a set of four and I packaged them with a little sash made from vellum paper and grosgrain ribbon.


See ya later, hep cats!

Charity
Monday, July 14, 2008

Alphabet Adventures - "L is for Long Lost Leggings"

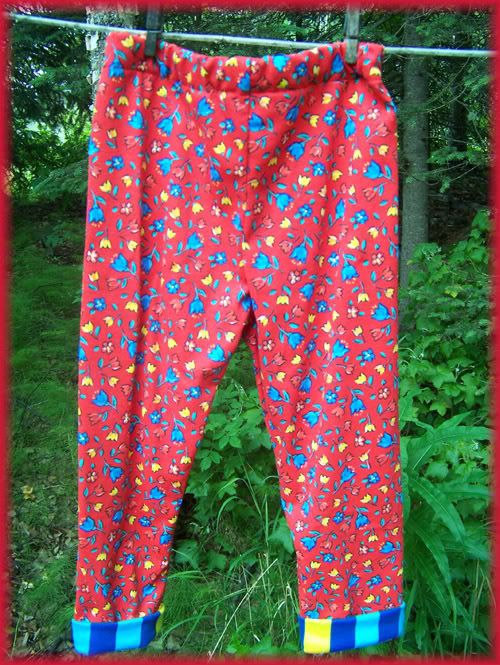
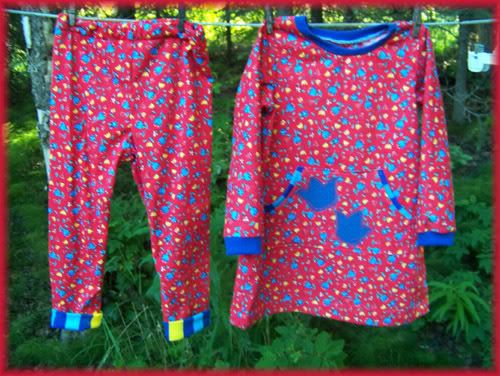
Today's Alphabet Adventure is brought to you by the "Letter L" and "Long Lost Leggings". I was scrounging around in my sewing room and came across a pair of child's knit leggings and tunic/dress outfit that I had started a couple of years ago! The outift was almost done. I'm not sure how I got derailed from the project.

The leggings just needed the waistband turned down and elastic ran through the tunnel. The tunic only needed hemming and the appliquéd kangaroo pocket attached. So here are the leggings finally completed and I'll update the post with the tunic as soon as I get it finished. This is about a size 4/5T, I believe. It's been so long I don't remember! My bad. :) But we have quite a few little cuties at church in this size range and I'm sure it will find a happy home somewhere!


Charity
Sunday, July 13, 2008

Alphabet Adventures - "K is for Kitchen Towel"

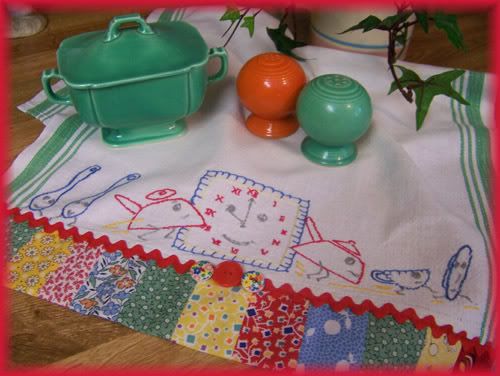
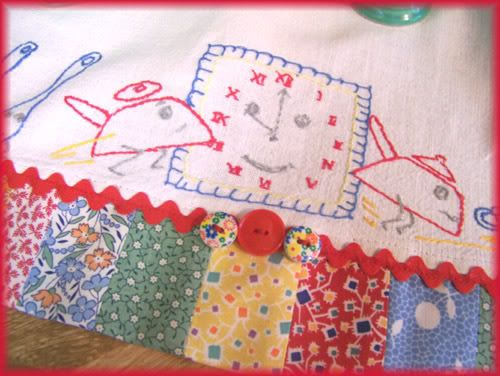
Today's post is brought to you by the Letter "K" and the humble Kitchen Towel. This was a embroidered vintage kitchen towel that I found quite a few years ago. It was adorable, but I think it's even cuter now! I added a strip-pieced border of 1930s reproduction prints and some 1970s floral buttons. "Granny's Apron" prints are some of my favorite quilt and crafting textiles. I think they are just so adorable! This took me under an hour to do. I think it would make a cute housewarming or hostess gift for a vintage-loving friend!


Charity
Saturday, July 12, 2008

Alphabet Adventures - "J is for Japanese Purse, Junkin' Finds and Juvenile Vintage Greeting Cards

Okay....today's a three-for-all! I have three things I want to share for the letter "J". So today is brought to you by Japanese Purses, Junkin' Finds and Juvenile Vintage Greeting Cards.

First the purse...This is Vogue 7354 and was given to me by my MIL.


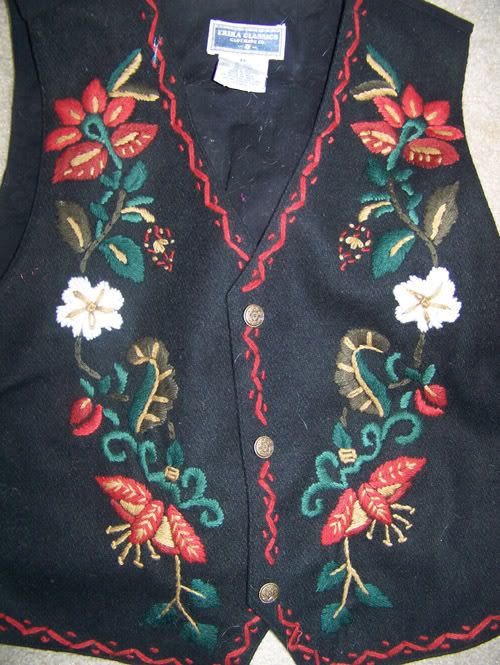
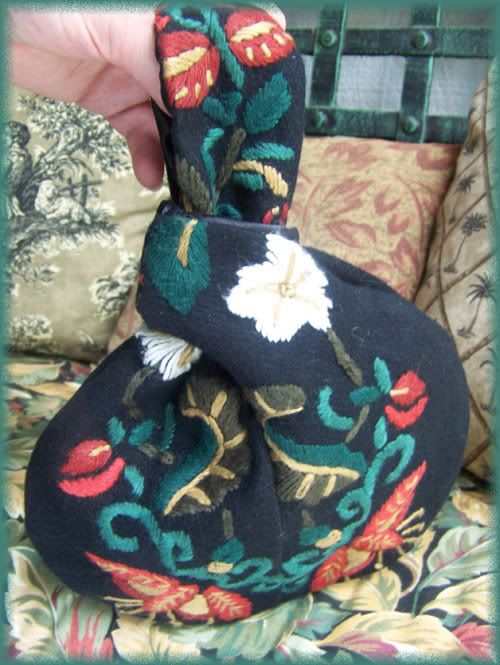
If you have this pattern, you'll note that the word Japanese appears no where on the envelope. One might think that I was forced to cheat on this particular letter. One would be wrong. This is called the Japanese purse pattern by my nieces. My MIL is teaching her grandaughters, my nieces, to sew. They are all the sweetest girls and they are 1/4 Japanese. They love to make little projects that allude to their heritage and these purses were made by the girls in oriental brocade and dubbed their "japanese purses." I decided to make my own from the pattern, though mine isn't remotely oriental in flavor. I made the purse below from a thrift store vest. I admired the embroidery work on it and bought it with the idea of using it on a coat collar or pillow top. But it became this purse instead. It has a slightly folk art, primitive/country look to it that I like. Bright spot of note...Only two pieces for this pattern. Heads up to Paula (of the 40-something purse pieces fame).

Thrift Store Vest Beginnings


"Japanese" Purse


My second "J" for today serves to share my recent craft related thrift store finds with you. My Junkin' Finds...

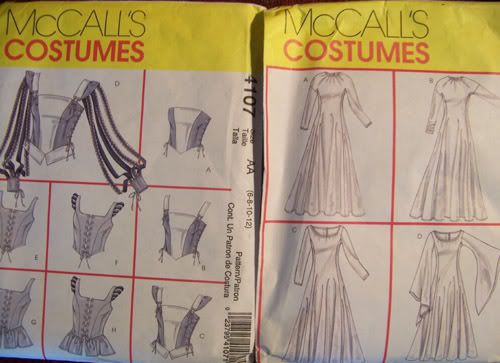
Costume Patterns for a dime each.


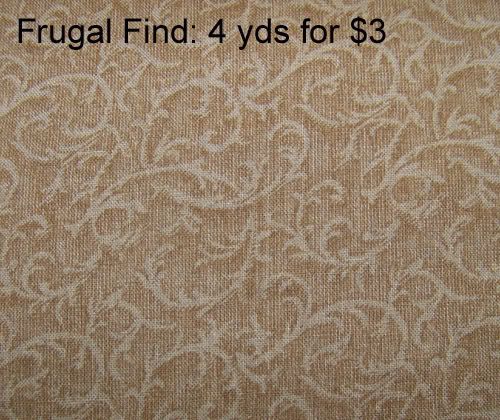
Fabric for Backing my Japanese Inspired Quilt (Hah! That makes FOUR J's for today)


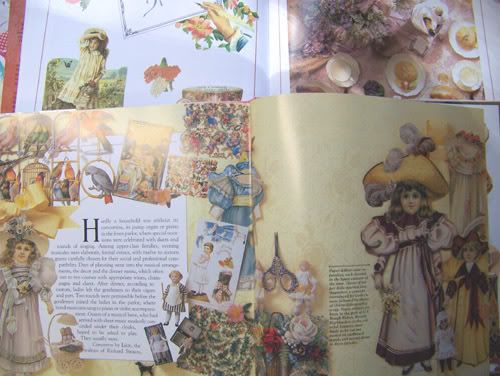
Victorian Illustrations Books for Papercrafting. These are just jammed with gorgeous graphics that will be perfect for making tags, collages, notecards and such. I only paid $1.00 for each book.


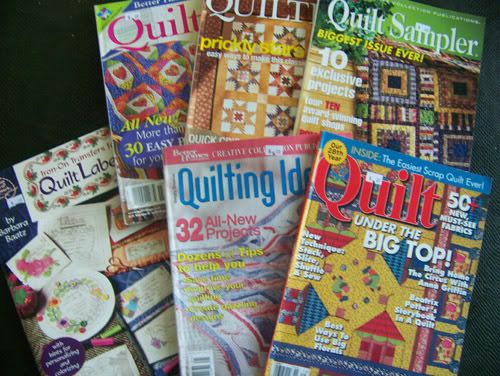
Stash of Quilting Magazines and one book of iron-on quilting labels - .25 each


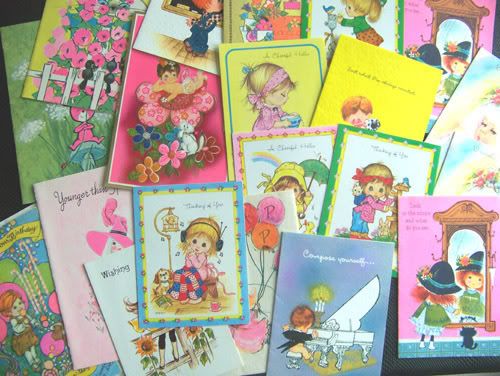
And my final J for today...look at these adorable sixties era Juvenile Greeting Cards I came across recently. Aren't they funky and retro?! Really fun. I'm going to use them to make retro-style gift tags to pop on my nieces Christmas presents this year.


Now since I exceeded letter expectations for today, does that mean I get an automatic out on a hard letter like X or U????

Charity