Saturday, April 05, 2008

Some of Us Are A Little Slow


I just recently realized that Blogger has a feature whereby I can index my posts by subject. This enables the reader to find all posts related to a certain subject, say...papercrafting, by simply clicking on that subject in the label list. You will find this label list waaaayyyyy down at the bottom of the left sidebar. However, I have more than 250 posts to go back through and relabel. This will take a very long time as I'll probably just do a dozen or so every day. So, recheck often to see what new old post you might discover. I had forgotten some of the good stuff buried in there. Hopefully, this will help us resurrect it. In time.

Charity

Where We Stand

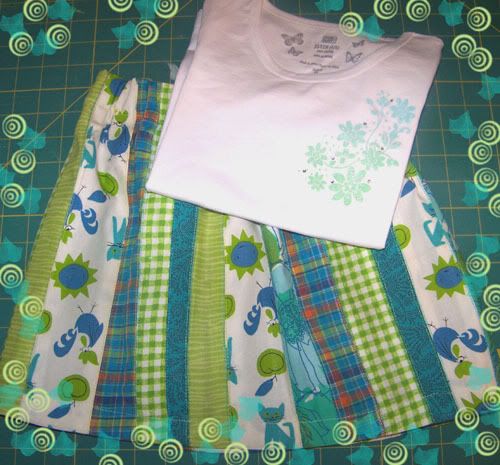
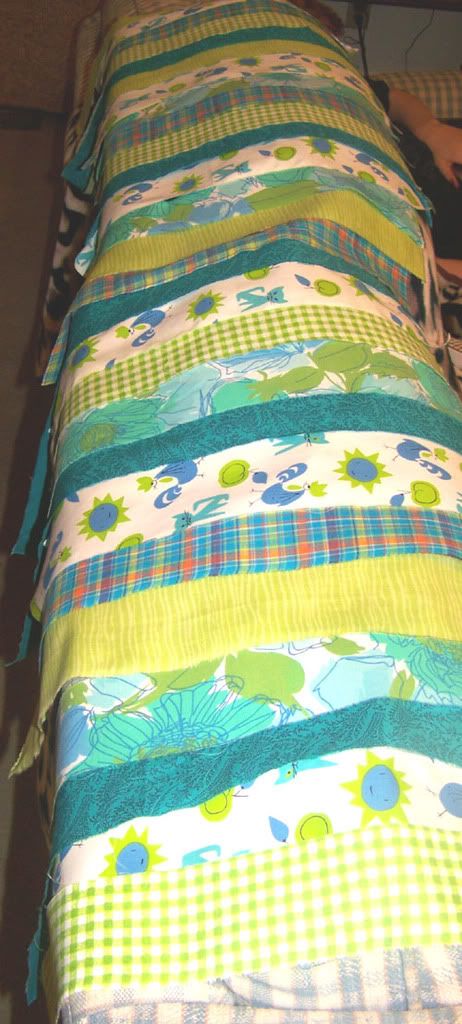
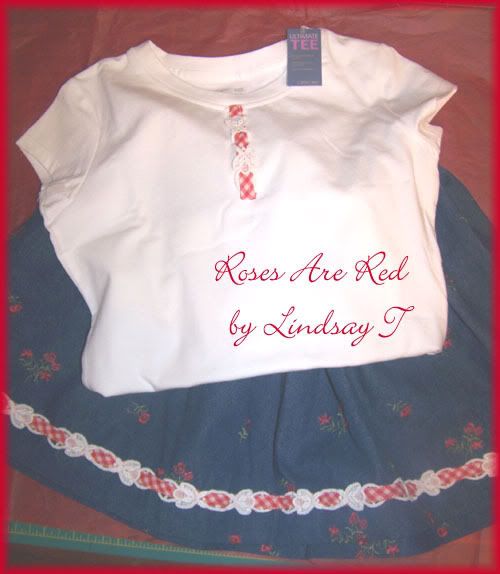
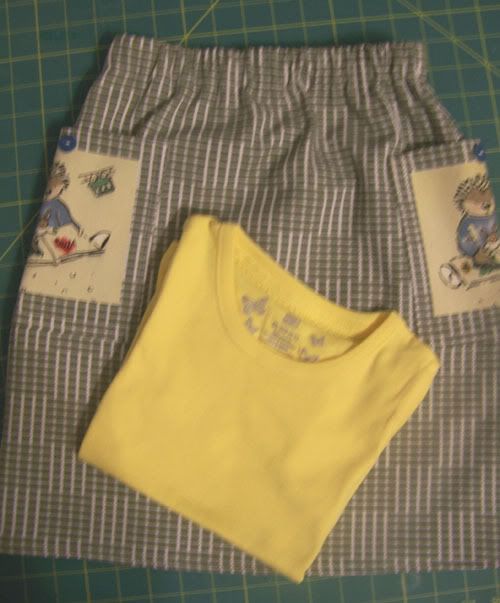
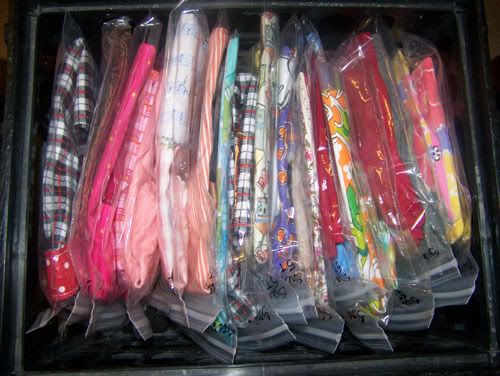
I am amazed that the requests to be involved in The Hundred Skirts Project continue to pour in. Almost daily! I thought I better get on the stick and post a progress report so that you all know what sizes are covered and which remain. So here it is...the count includes skirts which have been sewn by me, skirts I have already received from others and skirts promised, but not yet received. I will update this as skirts arrive and new participants come forward. Please know that if you had your heart set on sewing a size already covered, please go right ahead and do it anyway! A new dorm will soon be added and when it is completed, enrollment will grow. There will always be a need. And how cool if we exceeded our goal! So do what your heart tells you. :)

April 6th UPDATE - Received word of six more skirts being done by Sharon (see comments for link to her blog). I have updated the chart below to reflect that. We are well past the halfway point now with 68 skirts accounted for! Can I confess that I sit here puddling up and grabbing for the Kleenix?

Size 3Ts - DONE
Size 5Ts - DONE
Size 6 - 9 DONE, 1 cut out, but not yet assembled (mine)
Size 7 - 2 DONE, 8 NEEDED
Size 8 - 2 DONE, 8 NEEDED
Size 10 - 8 DONE, 2 NEEDED
Size 12 - 3 DONE, 7 NEEDED
Size 14 - 1 DONE, 9 NEEDED
Size 16 - 4 DONE, 6 NEEDED

8 Skirts promised, but sizes unknown. These are the attendees of a Mother-Daughter community service luncheon I will be having on April 15th. There will be 8 teenaged girls sewing skirts and I think most of them want to do their own sizes, which should be somewhere in the Sizes 12-Misses Small range.

In addition, to the children's sizes, I also need some Misses sizes for the older teenaged girls. Some of them are Plus sized. I will need to hear from the director for size guidance on these. I will post when I hear more about that, but for now these are the sizes I will need, but probably not as many of each as were needed for the children's sizes.

Misses Small -
Misses Medium -
Misses Large -
Misses XLarge - Have 1
Misses 2X

Can't begin to tell you how stunned and appreciative I am of the overwhelming response to this. I fully intended to plug away at these on my own, but how wonderful to get all this help! It's making it go so much faster which in light of the moved-up August deadline is just a godsend. Ya'll are the best! We always hear about how dangerous the Internet is and all the awful stories of predation and identity theft. But you never hear about stories like these...the amazing people doing great things for people they don't even know.

Blowing kisses...

Charity

Skirt #22..."Tropical Seas"

Finished the strip-pieced skirt featured in the tutorial below. I only have one more Size 6 to do and we will be done with that size range. Will post the last when I get it done. I have it cut out, but haven't started assembling it yet.


Charity

Friday, April 04, 2008

Pin-tucked Strip-piecing Tutorial

In the post below, I shared a pic of a little dress I made years ago using this technique. I reprised it here for Skirt #22..."Tropical Seas" (photo coming soon...I'm almost done!). I thought I'd go ahead and share the technique in a tutorial here. I hope you find it helpful!

PINTUCKED STRIP-PIECING TUTORIAL


Step One - Rip your fabric strips in varying widths and approximately the same length. Do not worry about getting the length exact. You will be trimming up later. Your strips should be at least 1.75 inches wide so that the seam allowances don't overlap when pressed open. Iron and starch your strips (no starch if it isn't appropriate for your fabric choice). Lay your strips out in a repetition that pleases you. I don't like to repeat exactly as it looks too matchy-matchy. I use the back of my couch for laying the strips out.


Step Two - You will need to press the seam allowances open after seaming the strips together. So it will be necessary to serge the edges of the strips before sewing them together. I just barely skim the edge trimming off the bit of fringe left from ripping the strips. Be sure to keep your strips in the order you set up in Step One.


Step Three - After finishing the raw edges, it's time to sew all the strips together. I use a 1/2 inch seam allowance. Just keep stitching all the pieces together until you have yardage sufficient for your project.


Step Four - The next step is to press your seam allowances open. After doing so, flip over the piece and press again from the other side. I use lots of steam and a bit of starch. Then take your pieced yardage to a cutting mat and using a rotary cutter and a ruler, neaten up both edges. Now you're ready for the pin-tucking.


Step Five - You will need excellent lighting and if your eyes are aging as mine are, a really good pair of reading glasses. Set up your machine with two spool spindles, a twin needle and either a regular foot of a pintuck foot. Select your threads. Since this is a decorative technique, I think it's fun to use strongly contrasting threads. I chose turquoise and kiwi for mine. Use a good quality thread. I had only Coats and Clark for my turquoise, but used Gutermann for the kiwi. The kiwi didn't break one time, but the Coats and Clark frayed up about every fourth pintuck! An interesting little test in thread quality. You will need to tighten your upper tension. The tighter the tension the more pronounced the tuck. Test on some scraps until you get the effect you desire. Use a 2.0 to 2.5 stitch length. Use a 1.6mm to 2mm twin needle for lightweight fabrics and 2.5mm to 3mm twin needle for mediumweight fabrics.

Now for the stitching...straddle the seam so that a needle falls on each side. Usually when I stitch I watch a spot on my foot or the seam guides on the needle plate rather than watching the needle. However, I found that I had to sew slow and keep an eagle eye right on the needles to keep the seamline exactly in the middle. If you're doing a large amount of yardage, you will need to rest your eyes occasionally. It gets a little tedious, but the effect is well worth it! Stitch down the length of each seam line until all have been pintucked.


Now you can cut out and construct your garment as desired. I think this technique would look beautiful in brown velvet, silk, satin and taffeta for an evening skirt or jacket. Or for the collar and cuffs of a funky batik jacket.

Coming Attraction

Watch this spot. I'm working on a tutorial for Pin-tucked Strip-Piecing. This is a technique I used to make the skirt on the little dress below. I'm using it to make Skirt #22 and thought I'd go ahead and take pics during the construction process so I could share the how-to's.


And you can see a little of the pintuck detailing here...


PS - Allison asked about the photos in her comment attached to this post. No, I did not take these photos. Several years ago I had an online children's design business. I sold mostly on Ebay, but did some private custom orders as well. There were quite a few Moms who were regular customers of Ebay designers. They would often be so generous as to take photos for designers' portfolios. These photos were part of a large collection featuring Ebay model, Sarah, and taken by her mother, Stacey. Isn't she adorable with those dark curls and big eyes? I think she was about 3 years old at the time. She's probably gotten to be a big girl by now! These photos were taken at her grandparents country club somewhere on the East Coast. They ARE beautiful, aren't they? I have about 20 more and each one is exquisite!

Thursday, April 03, 2008

Our First Bloggie Skirt!

The first skirt contributed by a blog reader arrived today. This one is from Lindsay T of Lindsay T Sews. It is sooo sweet. It's a size 6, which is perfect because that's the size I'm working on now. That means we are only 3 skirts away from closing this size out. And I know of one more Size 6 coming!

The skirt is made from a soft denim with tiny tossed red rosebud sprigs. It is very full which means the lucky little girl who receives it is going to have soooo much fun twirling to make it stand out! It also features this adorable vintage trim (60s era) of white roses and red gingham. The perfect touch. A little girl will just adore it. And as if the skirt wasn't wonderful enough, Lindsay has added a touch of trim to the tee's neckline which gives it the effect of a little button placket.

Thank you SO much, Lindsay. I can't tell you how much I appreciate your contribution. I know it's going to make some little girl smile from ear to ear!


Charity

PS - I apologize for the poor photo which doesn't do the skirt justice. It's a very overcast day today and i just couldn't get decent lighting.

You Like Me! You Really Like Me!


I've probably just dated myself with this post's title nod to Sally Fields, but so be it! Lisa Laree of Sew Random has nominated me for the "Excellent Blog Award" (brainchild of Project Mommy). Thank you, Lisa!

And my nominations in turn are...

Sew Confused - Nominated for its clean, fresh appearance, but mostly because of the personality of its owner. Paula reminds me of the perpetual girl-next-door. I like her easy-going writing style and gentle humor. Nice photos and inside glimpses at Paula's current projects.

Phat Chick Designs - A busy Mom, but a prolific seamstress and a frequent blogger. There's always something new to read. Great photos and love her sense of style.

Laura's Sewing Room - Not for the fragile of ego...this girl is simply stunning with the cutest little figure. Everything she makes is exquisitely executed and looks absolutely stunning on her. Elegant clothes, beautifully made.

Patterns from the Past - A great blog for lovers of vintage patterns. Beautiful graphics from a time when ladies dressed like ladies.

Patternaholic - Another fantastic vintage pattern blog. This one has lots of retro, 70s era patterns. I actually found several that I had sewed as a teen. What a great trip down memory lane!

Lindsay Sews - Have you always wanted to visit New York's fashion district? Well, you can live your dream vicariously through Linsday who is fortunate enough to live in the Big Apple. She blogs about her trips to the garment district. You will also see her own wonderful projects. I LOVE the floral anorak post she has up right now!

Two On, Two Off - I have to have at least one fellow-Alaskan on the list. Dawn proves that fashion is not entirely dead in the Last Great Frontier. And...can you believe the woman sews with two toddlers under foot? Prolifically even. Check out her amazing capsule wardrobe photo!

Studio Alexandra - Reading this blog is an education in meticulous construction. I especially have enjoyed following her gray sheath project which is a wonderful testimony to the power of underlining. There are some great inspiration photos up at the moment.

Sew Intriguing - She sews. She Knits. She takes fabulous photos. She has amazing fashion sense. Try not to hate her because she's also very sweet. Her blog is a great education in the fine details that distinguish home sewing from couture.

If your blog is listed above, feel free to lift the Excellent Blog badge and post it on your own web. You can also nominate ten recipients if you'd like. And there are far too many great blogs to ever do justice to them all! Please check out my blogroll to the left for more great blogs!

Wednesday, April 02, 2008

Skirt #20..."Bear Hugs"

Last one for today. This is a Size 6. It's made from a heavy twill, almost drapery weight. It's a sage green plaid with widely spread squares patches of a little bear reading a book. I used those squares for creating patch pockets on the side seams. Sorry about the poor quality photo. It's 9:25pm here and there is only really bad indoor lighting. I'm heading to bed...been up since 3:40 a.m!!

Skirt #19...."Preppy Petals"

Skirt #19.."Preppy Petals" (I am soooo gonna run out of cutesy names before I hit 100!). It is embellished with a growth tuck near the hemline and some button posies. This is a Size 6. That makes five of this size and I know of one more on the way! So we're more than halfway through this size.


Charity

Skirt #18..."Doggy Daze"

Another Size 6. This one embellished with a ruffle (and I just noticed that the ruffle is on upside down. Arrgghh!) I will buy a red tee to go with this skirt. I don't know that I'll get more done today. I have got to address some housework and need to paint some hallway doors and trim. If I get another finished, I'll post it. I'm aiming for two skirts a day to meet the goal by August.

Doggy Daze

Skirt #17..."Apple of My Eye"

A Size 6 - "Apple of My Eye"


Charity

A Running Start

I hope to get several skirts done today. It's 3:40 a.m. and we're heading out the door to take Craig to the airport. Instead of returning to bed when I get back, I'm going to hit the sewing machine and knock out the last of the Size 6 skirts. I have two Size 6s on their way from you wonderful gals online and have two already made. So only 6 more and I'll have three whole size groups done! Yeah! I'll post as I get them completed. And I'll catch up on Vintage Pattern Sunday when I return from the airport.

And just for fun...here's the Skirt Stash to date...


Charity

Tuesday, April 01, 2008

Decorating, Part Two

I finished up the valance in the post below. Of course when I went back to buy more trim, the store was out of the color I needed! Murphy's Law. But I selected a gold that was a bit more subdued and worked a little better anyway. I also finished the runner I was planning from the same fabrics. These were fabrics from my stash so there was no cost involved. The back of the runner has a Christmas print so I can just flip it over for the holiday.

When I made my trip to the decor store, I found two buffet lamps that I just loved. But they were $125 each and I just could not justify $250 for an accessory item. The ones below are not nearly as fancy or nice as the ones I loved, but at 9.98 for the lamp and 9.98 for the shade, the cost ended up being 16% of what the others would have cost me. I will add a little ribbon sash to the shade to dress them up a bit. Thank goodness for Wal-Mart!


This is my next home decor sewing project. I have two of these rockers that need the cushions covered with that leaf print. I will use piping on the edges. I'd prefer brush fringe, but can't find it locally. And then I want to make a rustic pillow from a burlap-like fabric and wool with felted wool leaves appliqued.


And here I did some "Use What You Have" decorating, pulling odds and ends from around the house and rearranging them to fill this little empty spot.


Charity

Monday, March 31, 2008

Scheduling Issues

You've probably noticed that Vintage Pattern Sunday didn't show up yesterday. I was unable to get Mozilla to fire up yesterday. In addition, eldest son was home for the weekend and I didn't want to spend much time online anyway. So, sorry. :( I'll see if I can get the computer to cooperate and do some catch-up posting.

I'm also not having Sewing Lessons Monday today. We have a series of appointments in Anchorage today and I had to cancel on the girls. We'll be trying to reschedule later in the week and I'll keep you apprised of our doings then! I don't want to miss because we planned to wrap up our unit on applique today. I'm anxious to start on the next section with them, Fabric Modification.

So...I'm off to do some quick grocery shopping before heading off to the dentist and tire shop. Oh joy! What a fantastically fun way to start the week...


Charity