Thursday, May 08, 2008

Mother's Day Gifts You Can Make - Idea Ten


Today's suggestion for my Mother's Day Gift idea series is an old one...creating themed gift baskets. I love putting together pretty baskets of fun little odds and ends. Such fun to explore and discover each little goodie. The one below is a crafter/seamstress's basket. Lots of fun pretties. There are...(I apologize for the poor photos. I took this at night and there was no natural lighting available).

Handmade buttons covered with vintage linens and fragments of an antique silk kimono. Strung onto a hand-crafted card with a cute kitty tag.


Perle cotton for hand-embroidery, strung onto hand-crafted cardboard spools made from pre-cut tags, vintage gift wrap, vintage greeting card cut-outs and then strung onto wire.


Hand-painted vintage seam binding which I bought from Pink Rose Pastries. She has the most adorable stuff ever!

Ribbons and trims wrapped onto glitter-crusted vintage clothespins


There are also handcrafted gift tags, tiny tassels, vintage laces and trims, a large albino silk peacock (out of this world!) silk flowers, snowflake crochet kits, cards hand-crafted from vintage papers, and pink vintage bump chenille wire. All on a bed of hand-shredded vintage music.


Here are theme ideas for your own basket:

Gardening
Cooking
Massage
Bath
Reading
Crochet
Knitting
Scrapbooking
Card-Making
Candles
Favorite Sport
Music
Picnic
Chocolate
Espresso
Tea
Foreign Foods
Travel

Fashion Show Coming Saturday!

I received another wonderful package of GORGEOUS skirts in the mail today. This time from Noreen of New York. Three size 10s. They are sooooo cute and the construction is perfection. And the sweetest touch is that her little daughter made the tags and the artwork is heart-warmingly irresistible. How perfect is the timing on that? A mother-daughter package arriving on Mother's Day weekend? Serendipity.

So, Saturday you will be treated to a fashion show of Betty's (of Texas) TWELVE skirt sets. They are bright and tropical and kicky-fun! Perfect for a hot weather climate. And then I will also share Noreen-and-Daughter's (of New York) skirt sets. It will take me awhile to photograph 15 sets, so hence the Saturday showing. But the wait will be worth it. I'm so excited to see these packages starting to come in. I'm off to update our statistics (see sidebar). And for those still sewing, I will need time to reship them all as a group to my father before his trip in August. I will give you a set deadline as soon as I know his exact trip date. Ya'll are wonderful. I wish each and everyone of you could be with me as these packages arrive, are opened and each adorable gift discovered.

HUGS!

Charity

What's Your Dream Project?

Do you have a sewing project that you've carried in your head as your "ultimate dream project?" Something that if you had limitless time, money and talent would be the first thing you'd want to create? What was it inspired by? Where did you get the idea? And what's keeping you from doing it?

I have a sketch in my inspiration notebook for a black artwear apliqued coat that I AM going to make some day. I'm even debating starting it now and seeing if I could get it done in time for the fair. It was inspired by, of all things, a Mary Engelbreit Christmas card. One of her Santas wears a cloak that I just adored. I envisioned turning up the volume on the applique design and making an evening coat out of it.

And I'm thinking that pretty soon, I'm going to have to quit dreaming and start making this dream coat (hmmm??? Is there a musical in this somewhere?) a reality. I never said anything to anyone about my ultimate project, but as if she had read my mind my mother-in-law, my favorite sewing buddy, mailed me a drool-worthy 6 yard piece of black Pendleton wool. Sigh....so, see? I have to make this thing now.

I don't think I can post a photo of the card without violating copyrights? You can see a picture of it HERE. I will find my sketch in my inspiration notebook and update this post with it sometime this evening. Gotta scoot and pick my kid up from school...

Tell me about YOUR dream project. You can comment about it here or post in your own blog and then come back and leave a link so we can come read your thoughts.

Wednesday, May 07, 2008

Mother's Day Gifts You Can Make - Idea Nine


You know the drill by now. HERE are the previous posts in this series on Mother's Day Gifts You Can Make. This is post #9 and today I'm suggesting making cupcake stands, cake plates, petit four plates or trinket display stands. You pick the moniker! These are quick, easy and inexpensive to make. So if you're running late at this point, you can still get in a handmade gift for Mom.

You'll need: glass/ceramic glue, candlesticks, pottery or glass plate or saucer. Optional: glass dome. I find these items in thrift stores and keep a small stash on hand for when I need to make one quick. They make a nice hostess gift when you fill the plate with goodies. :)

Directions: Simply glue and candlesticks to the saucer or plate using the ceramic glue. That's it! Told ya it was quick and easy. My favorite kind of craft. :)

PHOTOS OF PAST CREATIONS:

The Gilmore Girls Cards

Just a quick show-and-tell. Made these last night. I call them the Gilmore Girls cards because I made them while watching a Season 5 DVD. I felt that was an appropriate choice of viewing material while making Mother's Day gifts. There are four of them, each with different images and text. They're made from a vintage Raggedy Ann book (not one of the really old ones, would never be that cruel...)

Sewing Room Update

You'd have to be a long-term reader to recall my discussing the sewing room DH is building for me in our unfinished basement. You can read about it here and see the roughed out room plan here. I say long-term because we are moving slooooowww on all our home improvements at current time. I asked DH to consider laying aside our home improvements, except those absolutely necessary such as replacing a septic tank or something like that, until our last child has left home. It's only a couple of years away. We can then be distracted to our heart's content. But for these last few formative years, I really want them to have a full-on, hands-on Dad. Teenaged boys on the edge of manhood really need that time in by a good man. So...you won't read much here about our home improvements and that's by design.

However, DH was insistent that we at least needed to get my sewing room set up exactly as the plan laid out, using temporary, jury-rigged measures so that we have no money in to things that are open to change. Then he wants me to work there for a period of months so that I can find exactly what works and doesn't work before the room becomes permanent. We have already determined and fixed a few problems. More circuits are needed. When I turned all my machines and iron on at the same time, a circuit blew. The light needs to come in at an angle in the construction area as overhead lighting is creating shadows. Not sure how to do that yet. The cutting table (at the height suggested in sewing books) was too short for me at 5'9". I found that I was standing with one hip cock-eyed to compensate and was getting a sore back. DH raised it and now everything's fine in that area. I also found that my feet were getting sore and we added ergonomic workstation floor pads to our list.

I have been amazed at how much more I am getting done. I didn't really mind the hauling things up and down from the basement in order to sew at the table upstairs. I had no idea how much difference an efficient working area makes to my productivity levels. My two little sewing buddies have noticed that our time together is going more smoothly as well.

Anyway...I had promised pics of the rough positioning we came up with in our room. Here it is. Keep in mind that this is all TEMPORARY and using sawhorses and such. We did not want to invest in cabinetry, counters and cabinets until we know FOR SURE that everything is going to work.

This is the construction area. It is roughly 8 x 10 feet. The back wall under the window will be the pressing area with both a regular board and a steam table. The counters allow enough room for about 7 machines (two on the backside of the table in the foreground) should I decide to go commercial with the sewing lessons. Above the tables will be pegboard for tools used during the construction process. I don't want cabinets above me when I sew. It makes me feel claustrophobic. A rolling chair will allow a quick pivot from sewing machine to serger and a scoot over to the ironing board (which I put at seated height when sewing). I've found that this alone saves me HUGE amounts of time as I iron between every construction step.


This area will have a small side table, a pretty lady's upholstered chair, a good floor lamp and bookshelves. It will be where I sit and watch a sewing video while doing handwork, where I read, consult a sewing manual, etc. Behind the chair will be a corkboard for pinning up inspiration pics, samples and things that inspire me or make me smile.


This mess is stuff I still need to go through and organize. Yikes! This will be a very wide closet with oversized doors (open in middle, swinging out). The doors will be covered with flannel to create a place for me to layout quilt block designs. DH's suggestion. This whole wall on this room will be white cabinetry and shelves to accommodate books, tools, papercrafting stuff, paint stuff, craft stuff. The last bookcase in the far corner holds all my boxes of patterns. The closet is very deep and goes under a stair well. It will hold a lot, but will be a challenge to figure out how to store lots of things but still have them all easily accessible.


From the door in the corner, across the short wall at the end of the room and then down the long wall all the way to the construction area will be floor to ceiling wire shelving with baskets for my fabric storage. There will be one small section left clear with a hanging rod for hanging finished garments or nearly finished projects. The cutting island will be in the center. It is about 4x5 feet, but will have drop down wings that can be pulled up when I want a larger work area. It will be on wheels so it can be pushed to the side if needed. It will be custom made with storage drawer and cubbies underneath for all the tools related to pattern drafting, marking and cutting. I also do my papercrafting while standing at this table.


As far as decor...I'm still wanting to go 40s retro. As inspired by the fruit and floral table linens and fiestaware colors of that era. I want a red and white checkerboard tile floor. I want red countertops and white cabinetry. I was strongly advised NOT to do red countertops. So I put down red shelf liner under my machines to see if it truly would be a problem. And I just love being surrounded by color when I work. It makes me happy. The red counter idea will stay.

Lighting remains a problem. I just can't figure out what will work. It seems no matter what I try there are shadows. So that still has to be solved. Other than that, I am finding that the original blueprint is really working out as I had hoped. I am very happy!

Charity

Tuesday, May 06, 2008

Mother's Day Gifts You Can Make - Idea Eight

Here are the rest of the posts for those of you who just came in...

Idea #8 is...drumroll, please..."Lapel Brooches." I'm still working on my version of these and will update when I get them done. I need to mail off my gifts tomm. but I will continue with the Mother's Day Gifts You Can Make post series until Saturday. Here are a couple of brooches I've made in the past. And at the bottom, there are links to lots of tutorials.


Online Brooch Tutorials

Felted Brooch

Sparkly Brooch (this is a shamrock, but the shape could be changed to a flower)
Fabric Flower
Fabric Flower
Felt Brooch
Wise Craft Fabric Flowers
Necktie Flower Brooches
Felt and Crochet Brooch
Eyelet Lace Brooch
Raggy Flower Brooch
Beaded Heart Brooch
Kanzashi Floral Brooch

Lame-O Book Meme Girl

Liana of Sew Intriguing was kind enough to tag me for a Book Meme. The poor girl will probably forever regret it. My computer sits in the homeschool room. We no longer homeschool, but the moniker has stuck for good. There is a wall of books behind me, BUT the book sitting nearest me, about 1 foot to to my right, is the phone book. Sigh...so now I face a moral dilemma. Do I follow the meme instructions even though I am bound to look like a Meme Moron or do I fudge things a little and go pick out some really profound and moving book off my shelves and use that one (assuming I can find such a title on my shelves which are usually flooded with non-fiction books on subjects related to my personal interest)?

I decide on an adaption to the meme that isn't EXACTLY per instructions, but is still within the spirit of the project. I will use the last book I touched. Today that happens to be a vintage children's book I picked up just an hour or so ago at a local thrift store. I intend to use its Bobbsey Twin-ish illustrations to make notecards. Here is the brilliant dialogue offered for your intellectual dissection...

"They were delighted to find that there was very little damage. It was badly scratched, but Aunt Patricia's father said, "With a fresh coat of paint it will look like new." "Come on, Aunt Pat," said Eddie, "Let's explore. Maybe a lot of valuable property was washed up in that big storm."


And I end there. You will never know what happens next. Do Aunt Pat and Eddie discover buried pirate treasure? A dozen pair of Nikes? A giant Lego man, perhaps? You'll have to stumble across your very own copy of Annie, Pat and Eddie by Carolyn Haywood to find out...

Since I have no way to know who likes to play these fun little games, I'm going to invite all readers interested in participating. Simply post your Book Meme entry according to the rules below to your own blog. Then leave a comment here with a link to your blog so we can all come see if you keep a better class of reading material close at hand than I do! :)

BOOK MEME ENTRY GUIDELINES

1. Pick up the nearest book.
2. Turn to page 123
3. Find the fifth sentence
4. Post the next three sentences.
5. Tag five people and acknowledge who tagged you.

Monday, May 05, 2008

A Good Time Was Had By All

I just spent the most enjoyable evening doing one of my favorite activities...papercrafting while watching a movie. I sometimes feel guilty just sitting and watching a movie. Wasting time and all that. And I love to papercraft, but find that I need a little more to occupy my mind. So, combining both meets my need to be productive and be mentally engaged while still relaxing. And I LOVED tonight's movie. If you haven't seen Dan In Real Life yet, it's definitely worth picking up at the local rental store. It's very sweet, funny, heart-warming, etc. The family in the movie is soooo quirky but appealing. You just yearn to step through the screen and into their home. They're like the Walton's for the next millennium. It's a true feel-good flick.

And here are the cards I made while watching it. They are made from recycled, thrifted greeting cards cut down to fit scrap envelopes I had on hand. Then I added scrapbooking papers, vintage children's Crazy 8 cards and victorian bluebird diecuts. They will probably go in my "gift stash" I like to keep on hand.


And here are two "friends" cards that are blank inside. These are also recycled greeting cards made over with scrapbook paper, rose die cuts (cut from greeting cards) and an image cut from the cutest 60s-era beauty school textbook.


And then I bundled them together with ribbon, silk rose, millinery leaf, a bit of organza and a cupcake topper ballerina.

Discharge Dyeing Tutorial

This is a technique with which we experimented during our sewing lessons today. It's not for the mess-intolerant, but if you tolerated the PlayDough Stage with your toddlers, you can probably handle this. The girls had so much fun with this that they decided to forego project sewing time in order to continue experimenting. I was hard-pressed to get them to stop even for lunch!

Discharge Dyeing Tutorial


This technique involves removing existing color from a fabric using bleach. Materials needed include: dark fabric, bleach, vinegar, spray bottle, water, PVC pipe, leaves, ferns, plastic doilies, rubber bands, strings, strong thread, contact paper, rickrack, notebook paper reinforcements, stencils, bits of hardware, coins, etc. You will need to wear protective clothing and gloves.

Step 1 – Prepare your solutions. Line up three buckets and mix solutions as follows: Bucket 1: Bleach Solution (1 part bleach to 2 parts water). Bucket 2: Plain, clean water. Bucket 3: Vinegar Solution (1 part vinegar to 4 parts water). Mix 1 part bleach to 2 parts water in a spray bottle as well. Be sure all containers are clearly labeled.


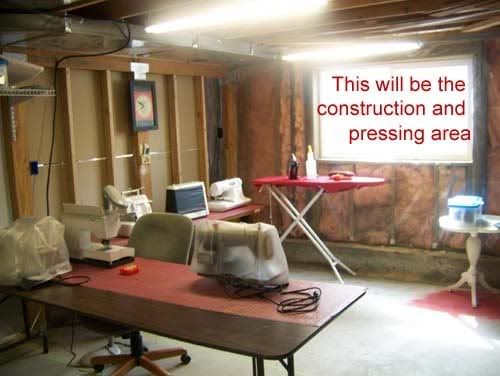
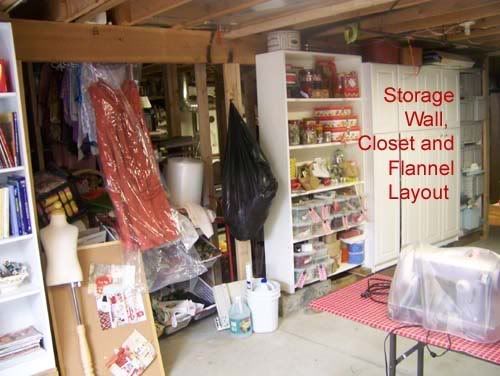
Step 2 – Prepare your working surface. You will need to protect your working surface by laying down a plastic tarp or garbage bags. It's best to do this outside or somewhere with good ventilation.

Step 3 – Prepare your design. Decide how you will create your design. You can lay the fabric flat and arrange leaves, doilies, stencil, shapes cut from contact paper or other items on the surface. Or you can bundle the fabric with rubber bands as if you were tie-dyeing. Another interesting method is to stuff the fabric in a short length of PVC pipe. Simply look around your house for a variety of objects that might create interesting textures on fabric. Here are some things I gathered.


And here's how one of my students, Sarah, arranged objects for her first attempt.


Step 4 – Discharge dye. If your item is to be sprayed, spray the solution around your resist object. How much you spray depends on how much color you wish to remove. Remember that the effect will get more intense the longer the solution remains. If the item is to be dunked, set it into Bleach bucket and check on it every few minutes, removing it once it reached your desired outcome. You can also paint the solution on with a brush if desired, making brushed on designs.

Spraying Around a Resist


Using Large Chains As A Resist


Wrap and Dip Method


Step 5 – Neutralize the discharge solution. When you have your desired effect, soak your fabric in the Water bucket for a few minutes. Rinse, wring and then soak in the Vinegar bucket. Then rinse again in clear water. Launder as normal. Launder separately to be safe, just in case any discharge solution remains. Your fabric can then be used in your chosen project.


SAMPLES:

Our Samples Drying on the Line - Looks Like Hippy Laundry :)


Started As Plain Black Twill


Started as Black Velvet - Student used washer, twisted wire, rickrack and a owl flyswatter. :)


Started as Black velvet - Student used silk leaves


Denim - Ombre Dipped


Hot Pink Twill - I used a page of notebook reinforcement stickers as the resist
Bright Blue Linen - Wrapped with rubber bands and dipped
Brown Brushed Cotton - I used a stencil intended for making straight writing lines

Mother's Day Gifts You Can Make - Idea Seven

Day Seven in our series on Mother's Day Gifts You Can Make. To see all the posts on this subject click HERE. Today I'm offering beautiful decorative pillows as a gift idea for your mother. They are simple to sew. Do not require much fabric so you can really splurge on a beautiful textile. They can be made in a variety of styles, contemporary, victorian, country, primitive, southwestern, etc. Perhaps you could even sneak fabric remnants from her own decorating efforts out of her stash to create the perfectly matching decor offering. Here are some photos and links to get you going!

My Own Past Pillow Creations


LINKS TO TUTORIALS:
Log Cabin Quilt Pattern Pillow
Put a Zipper in Your Pillow Tutorial
Inspirational Quote Pillow
Reading Pillow Tutorial
Fancy Band Pillow Tutorial
Flange Pillow Tutorial

Tuck Pillow Tutorial

Button Back Pillow Tutorial

Ribbon Pillow Tutorial

Sunday, May 04, 2008

A Book To Share


I've been wanting to share this beautiful book with you all and finally had a few minutes to chat. I found this book among the treasure trove I wrote about here. It's called Folded Flowers by Kumiko Sudo. It is a beautifully illustrated book on fabric flower origami containing detailed instructions for miniature quilts, purses and individual flowers. It is combined with gorgeous watercolor illustrations and botanical information on flowers around the world. Major eye candy. I can't wait to give some of these things a try. I am particularly drawn to the bag below.


This book normally sells for $29.95. I was able to pick it up at my "special treasure spot" for $5.00! :) :)