First, you will need to know how to felt wool. You can use 100% wool fabric, but will get a thinner end result - closer to craft felt in thickness and texture. I prefer to use 100% wool knitted sweaters. I find them at the thrift stores.
1)Remove buttons, zippers and other hardware.
2)Cut apart the garment along seam lines so that you have two flat sleeves, a back and front. Leave on the ribbing where possible because they are sometimes interesting to incorporate in projects still attached (such as using a ribbed hem at the top of a Christmas stocking).
3) Wash the pieces in your washing machines hottest water cycle. Tumble dry on hottest setting.
4) Repeat as desired until you have reached your desired degree of felting.
1) Plan Your Design - After you've felted your wool, whether yardage or knitted garment, then you will sketch out your design. I have collected photos in my files from a variety of places online that feature felted wool embellishment. Simply type in "felted wool" or "wool felt" or "wool applique" into a search engine and you should get plenty of ideas to inspire you. Roughly sketch out your design keeping in mind the item it will embellish. Be sure to allow for seam allowances.
2) Cut Your Design Elements - Next, cut out your motifs and shapes from the wool. You do not need to allow extra to finish the edges. Because felted wool does not unravel you will need no extra margin for turning under or satin-stitching.
3) Layout Your Design - Begin shuffling your wool shapes around until you have a design that pleases you. I find it helpful to take a digital photo on the arrangement to refer to as you begin to stitch the pieces down. Pin the pieces in place.
4)Stitch Pieces In Place - Set up your machine with a thread color that closely matches your applique pieces. Secure the design to the garment by stitching very close to the edge of the applique pieces. Very narrow pieces may be stitched down the center. Larger pieces will need to be outlined. Leaves look attractive with the "veins" outlined in stitching. You will need to go slow, pivoting often as you stitch around each shape. Pull thread tails to the back of the garment and knot off.
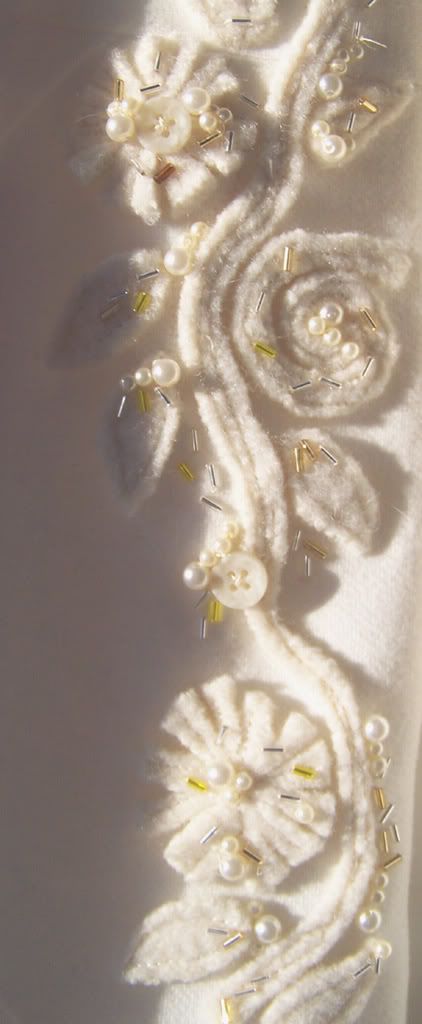
5) Embellish Design - You may wish to embellish your design with vintage beads, buttons, hand-embroidery, etc. Move to a comfortable chair, grab your reading glasses, set up some good lighting and pop a lllllloooonnnnnggggg movie into the DVD player. Embellish as desired with bugle beads, seed beads, sequins, pearls, vintage buttons, hand-embroidery, whatever your imagination requires. For my jacket, I used bugle beads, pearls and buttons to embellish the appliques simply filling in blank spots and using the beads to bridge design pieces.

Hope this helps!
Charity


1 comment:
Your embellishment is great. I have a boring winter coat that I want to decorate and your work has started my brainstorm. Thanks, Tamara
Post a Comment