
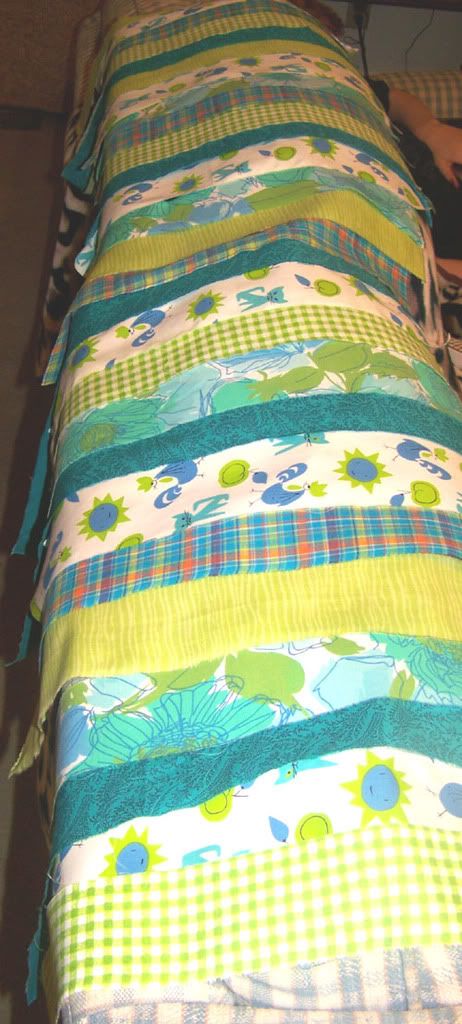
Step One - Rip your fabric strips in varying widths and approximately the same length. Do not worry about getting the length exact. You will be trimming up later. Your strips should be at least 1.75 inches wide so that the seam allowances don't overlap when pressed open. Iron and starch your strips (no starch if it isn't appropriate for your fabric choice). Lay your strips out in a repetition that pleases you. I don't like to repeat exactly as it looks too matchy-matchy. I use the back of my couch for laying the strips out.
Step Two - You will need to press the seam allowances open after seaming the strips together. So it will be necessary to serge the edges of the strips before sewing them together. I just barely skim the edge trimming off the bit of fringe left from ripping the strips. Be sure to keep your strips in the order you set up in Step One.

Step Three - After finishing the raw edges, it's time to sew all the strips together. I use a 1/2 inch seam allowance. Just keep stitching all the pieces together until you have yardage sufficient for your project.

Step Four - The next step is to press your seam allowances open. After doing so, flip over the piece and press again from the other side. I use lots of steam and a bit of starch. Then take your pieced yardage to a cutting mat and using a rotary cutter and a ruler, neaten up both edges. Now you're ready for the pin-tucking.

Step Five - You will need excellent lighting and if your eyes are aging as mine are, a really good pair of reading glasses. Set up your machine with two spool spindles, a twin needle and either a regular foot of a pintuck foot. Select your threads. Since this is a decorative technique, I think it's fun to use strongly contrasting threads. I chose turquoise and kiwi for mine. Use a good quality thread. I had only Coats and Clark for my turquoise, but used Gutermann for the kiwi. The kiwi didn't break one time, but the Coats and Clark frayed up about every fourth pintuck! An interesting little test in thread quality. You will need to tighten your upper tension. The tighter the tension the more pronounced the tuck. Test on some scraps until you get the effect you desire. Use a 2.0 to 2.5 stitch length. Use a 1.6mm to 2mm twin needle for lightweight fabrics and 2.5mm to 3mm twin needle for mediumweight fabrics.
Now for the stitching...straddle the seam so that a needle falls on each side. Usually when I stitch I watch a spot on my foot or the seam guides on the needle plate rather than watching the needle. However, I found that I had to sew slow and keep an eagle eye right on the needles to keep the seamline exactly in the middle. If you're doing a large amount of yardage, you will need to rest your eyes occasionally. It gets a little tedious, but the effect is well worth it! Stitch down the length of each seam line until all have been pintucked.

Now you can cut out and construct your garment as desired. I think this technique would look beautiful in brown velvet, silk, satin and taffeta for an evening skirt or jacket. Or for the collar and cuffs of a funky batik jacket.


5 comments:
Beautiful sewing ! The skirt on the dress is just gorgeous. Love the fabrics you've used also. I am a seamstress as well but I haven't the patience to do it very often... mostly just when my family asks me to sew something for them.
What an awesome new fabric you created. It will make such a fun skirt!
I have to say your coordination of fabric strips is amazing! I'm certainly not blessed with that skill and can appreciate your great taste. That's a skill in itself.
Thanks for the tutorial - it looks amazing. I like your suggestion of using this technique for collars, cuffs etc. - would be a great way of using up scraps too.
Very cute! I have an idea in mind for using that already...
Post a Comment