Wednesday, February 27, 2008

TOTE BAG TUTORIAL

TOTE BAG TUTORIAL


1) Cut your front and back, lining pieces according to desired size of bag. Here's how to determine that

Width (from side seam to side seam) - desired width plus 1/2 seam allowances

Height (from bottom of bag to top, not counting handles) - desired height plus 1/2 seam allowance for bottom seam and 1/2 inch seam allowance for top seam plus GUSSET ALLOWANCE. The gusset is what makes the purse have width across the bottom when it sits flat. You will fold under some of the height and so will need to allow extra for that. If you want your purse to be four inches deep across the bottom, then you will need to add 2 inches to the overall desired height.

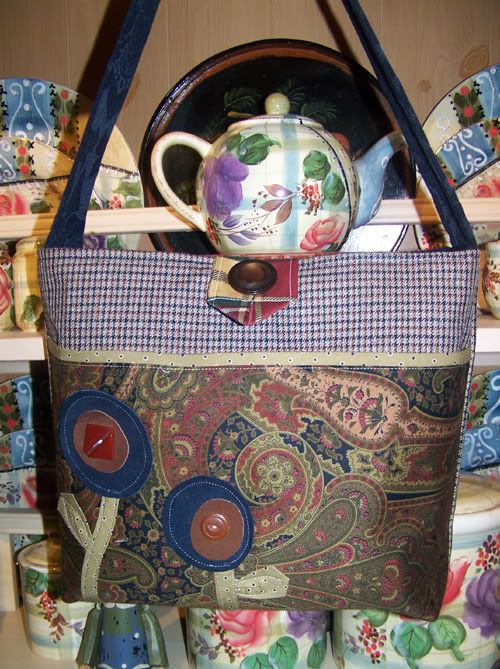
Embellish bag as desired. For this example, I did contemporary folk art flowers using bias strips, suede (cut from vintage elbow patches) and vintage buttons. Reinforce bag pieces with fusible fleece or Decor Bond, depending on how soft or firm you want your bag. I used two layers of Decor Bond on the shell and one layer of fusible fleece on the lining. This bag is extremely stiff.

Gusset


2) Add any external pocket desired to the shell and any internal pockets desired to the interior.

3) Sew lining front to lining back at the bottom seam. And shell front to shell back at the bottom seam. See photo.

Joining back to front


4) Sew side seams of shell front to back. Sew side seams of lining front to back. You should have a large pocket now. Interfacing should show.

5) Cut out corner piece to create gusset. You will cut a square half the size of your desired finished gusset plus 1/4 seam allowance. If you want your gusset four inches deep, you would cut a square 2.25 x2.25 out of the bottom corner. I you want a gusset two inches deep, you would cut a 1.25x1.25 square. See photo below.

Corner Cut for Gusset


6) Fold seams on bottom and side to match so that you create a box shape to the bottom of the bag. Sew. See photo below.

Match and pin seams to create gusset


Sewing Gusset


7) Turn shell to right side. Leave lining wrong sides out. Slip lining into shell. Push corner down to match shell corners.

Inserting Lining


8) Make Handles - Cut strip of fabric desired width and length plus seam allowances. Sew right sides together leaving ends open. Turn and press.

9) Make Closure - Make ties to tie the bag shut or make a loop for a button and attach button to the front.

10) Turn raw edges of both shell and lining towards the inside of the bag. I fold and press about 1/2 inch to the inside and pin. Insert handles and closure between shell and lining and pin. Top-stitch top of bag close.

Preparing to Topstitch


Hope this helps! Up next...recipe for my CopyCat OutBack Brown Bread

Charity

Monday, February 25, 2008

Sewing Lessons Day

Today was sewing lessons day with Sarah and Emily. We finished making our samples of seam types and seam finishes. We only have Tricot Bound left to do (I didn't have any Seams Great) and Serged. I'm not going to get into serging until the girls have a good grip on sewing first. Next week we will do some Creative Seaming techniques (bound and lapped, fringed and overlapped, slot seams, etc.). Then that will wrap up seams and we will start on learning some applique techniques next. And after applique, we will learn some creative fabric modifications (embossing, hand-painting, broomsticking, dyeing, acid-etching, felting, etc.)

On the project front, Emily finished her first project today! A sheath dress with lined empire bodice, bodice and skirt darts, overlapped invisible back zipper and turned straps. Lots to learn there for a beginner! The zipper frustrated us both a bit today. It fit in perfectly during the basting stage, but when Emily went to do the final stitching, one side turned out longer than the other so that the upper bodice edges were uneven. I have no idea how this happened. I had her undo and redo a couple of times. Each time the baste was fine, but the final stitch warped the zipper somehow. She finally got it down to a not-too-discernible, but still-not-perfect level and decided that that was good enough for a first run at a zipper. And on a difficult slippery polyester to boot! She took the dress home to hand hem and do the final cleaning up and pressing. I'll have her bring it back next week for photos and to fill out her Project Review Form.

Sarah had an interesting session with her vest today. It was strangely large on her compared to our first fitting. So we ended up doing what amounted to almost draping on her today. She altered the design lines on the vest point and back hem line quite a bit, using tailor tacks to mark the new design lines. She's taking quite a bit of time and putting a lot of thought into these first fitting and design sessions. I was concerned that she might be getting bored with how long its taking to get to the actual construction process, but she seems quite content to invest the time needed to get exactly what she wants. It was an educational process and we were both surprised at how much a simple inch shift in a design line can change the whole silhouette and look of a piece. Shifting her vest points and side length just a bit took the vest from being "cowgirl" (her words) to "shapely classic." She has a good eye and solid instincts. She can be trusted to make good design choices. I'm hoping that we can make some swift progress next week as we finally begin construction. She might be patient, but I'm getting anxious to see what this will look like!!!

I'm off to catch up on housework. It gets neglected a bit on Mondays, but sewing is SO MUCH MORE FUN! :) :)

Sunday, February 24, 2008

Weekend Projects

We had a busy weekend, but I did manage to get two simple and quick projects done, an apron and a tote. It's Sunday night and I've about used up all my allotted weekend brain cells. So not up for much witty banter...the photos will have to suffice.


Charity